Formatted Text
Give your form a professional look and feel by adding some formatted text. This could be an introduction to your form, or placed anywhere you want to provide additional content.
Using the rich text editor in the Formatted Text module, you can:
- Change the text format, color, size, and alignment
- Add bulleted/numbered lists, images, links, and tables
- Insert dynamic values using short-codes
- Use your own HTML code.
Note: Tables in the Formatted Text module are static tables. If you want to add a dynamic table that can be filled in, you will need to use a Field Table.
Adding formatted text
- In the Design Elements panel (left of screen), click and drag the Add Formatted Text element on to your form.
- Enter your text and select the required formatting from the tool bar.
- (Optional) To attach a URL, document, or file, highlight the relevant text and click the link icon.
- (Optional) To insert dynamic values, click Insert Form Answers. Copy/paste the relevant short-codes into the Formatted Text box.
- (Optional) Click Show Advanced Options to add a border or change background colour.
- Click Save & Close.
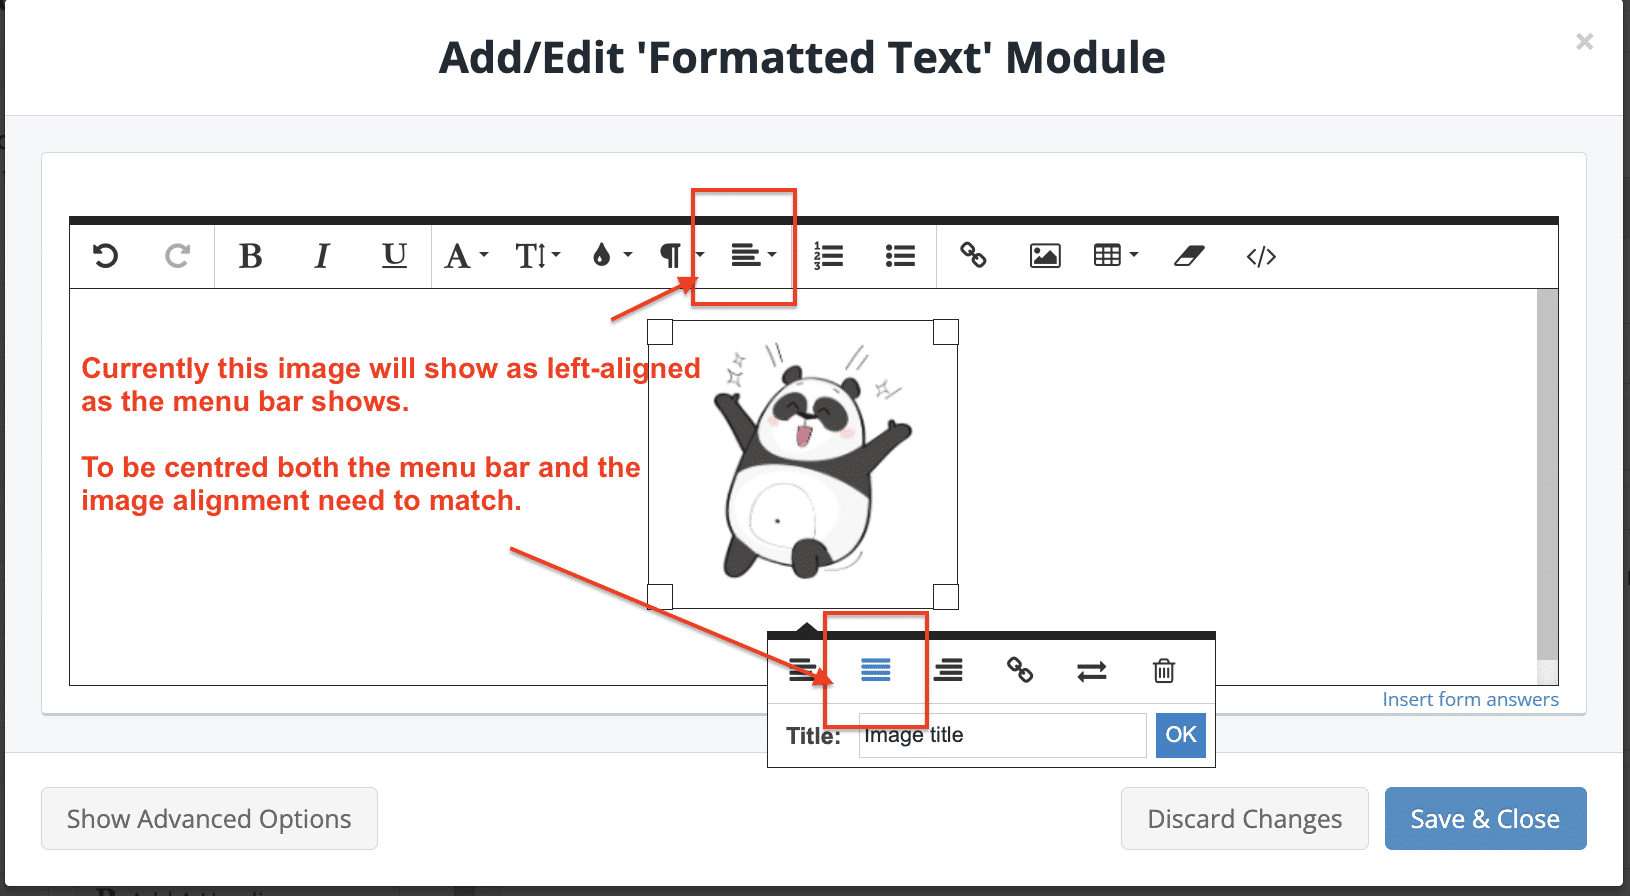
Aligning images
When adding images as part of your formatted text, you will see that there are additional controls for aligning images.
To ensure that the image appears correctly when viewing the form online, you need to make the image alignment the same as the alignment set in the tool bar.
Inserting dynamic values using short-codes
Each field in your form has a unique short-code, enclosed in double curly braces {{ and }}, that can be used to insert dynamic values within a formatted text field.
This is especially useful in cases where you want to:
- provide a summary of specific response data
- update contract text using response data
- display a payment summary table on order forms.

To learn more about short-codes, see Using short-codes to insert dynamic content