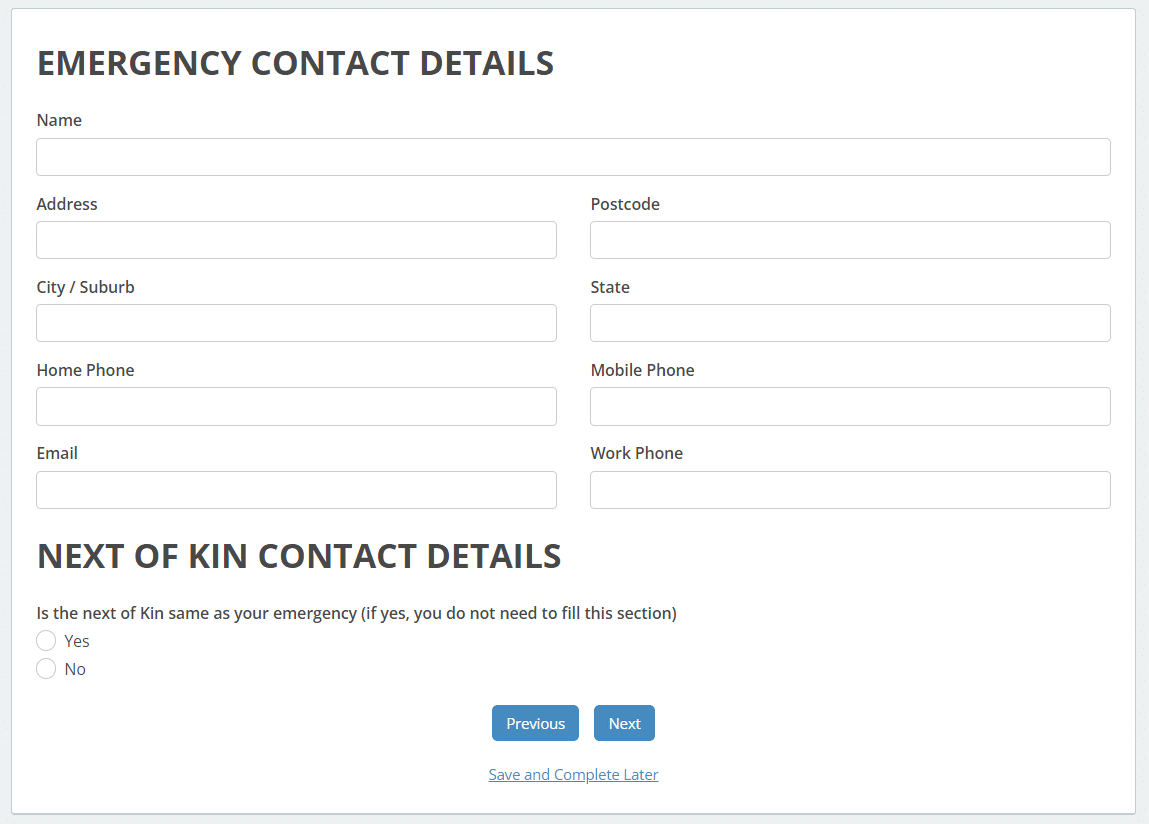
Multi-page forms with page breaks
Start by adding all the form fields you need, then simply drop in page breaks to separate your form into easy-to-digest sections. Form users can effortlessly navigate between pages using the ‘Next’ and ‘Back’ buttons.
Adding a page break to your form
- In the Design Elements panel (left of screen), click and drag the Page Break element to the position where you want one page to end and the next to begin.
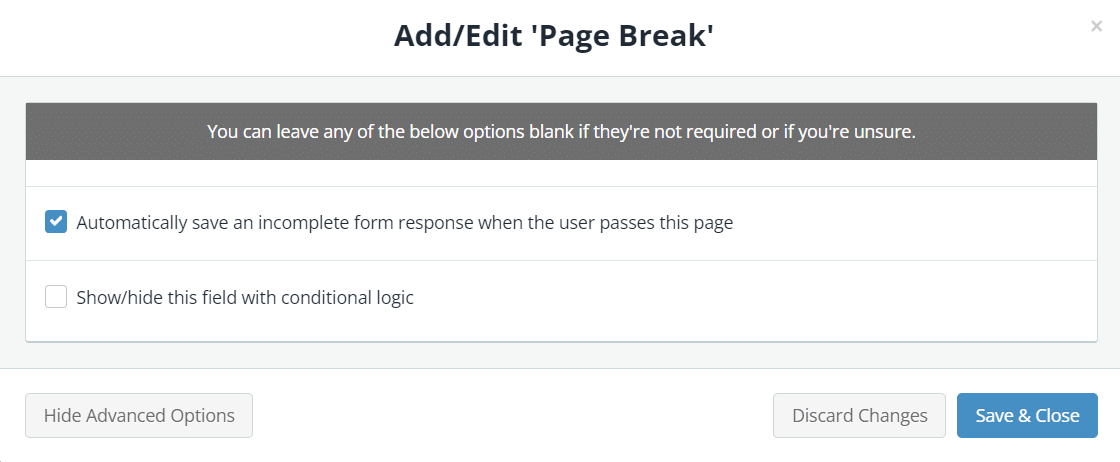
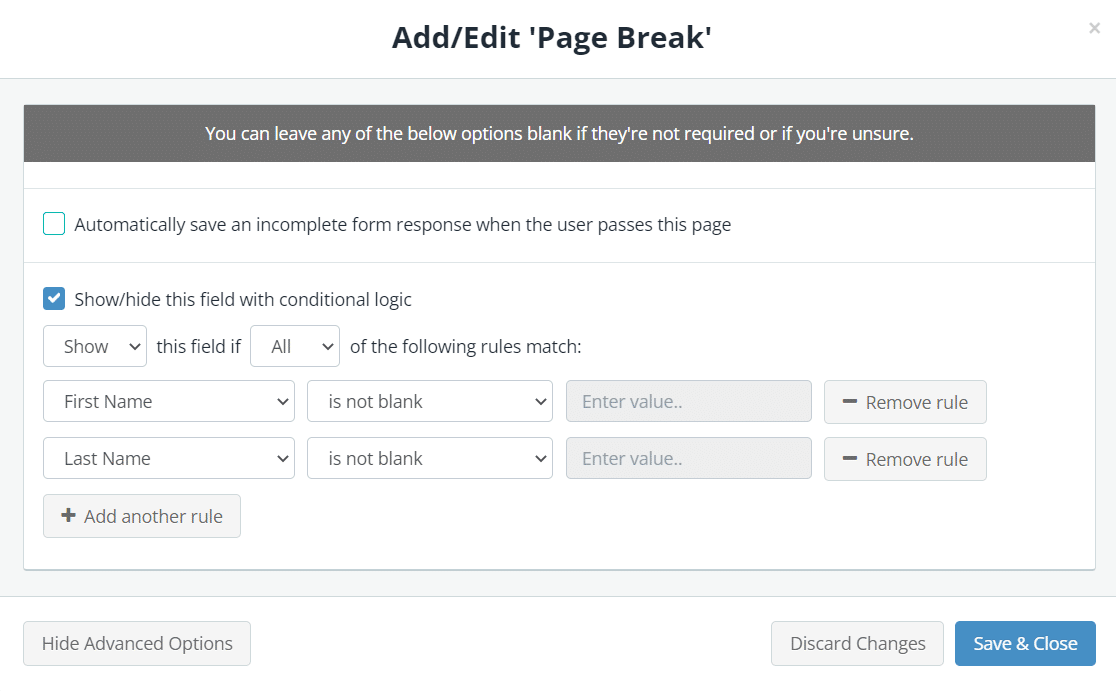
- (Optional) If you want to automatically save incomplete form responses when form users move to the next page, click the Show Advanced button and enable the auto-saving option.

- Click Save & Close.
- Scroll up and click Save to save the form.
- (Optional) Click the View Form button to view your form and test the multi-page process.
Adding a progress bar
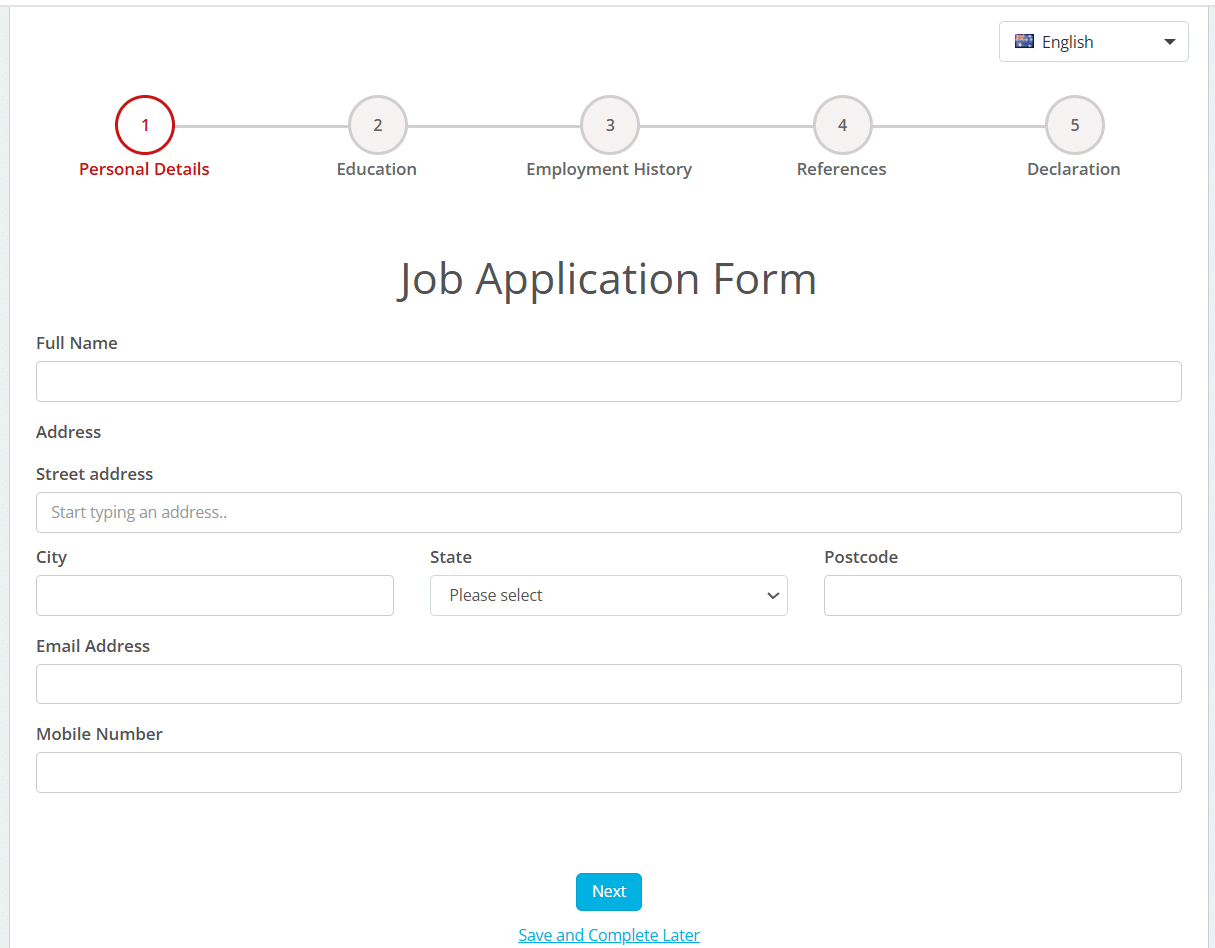
Ready to elevate your form design? Adding a progress bar will give your form users a clear sense of where they are in the process, keeping them motivated to complete the form. Plus, you can customise it to display either page numbers or titles—whichever suits your style.
To add a progress bar:
- Navigate to Form Settings > Usability and tick the Enable progress bar for multi-page forms checkbox.
- Select a Progress Bar Style.
- Select your preferred Progress Bar Direction, e.g ‘Horizontal’ displays the progress bar across the top of your form, ‘Vertical’ displays the progress bar on the left side of your form.
- (Optional) Pick a different colour for your progress bar.
- (Optional) If you want to display page titles in the progress bar, click the Page Titles checkbox and enter a name for each page. Note: Page titles are not displayed on progress bars when viewing forms on mobile devices.

- Scroll up and click Save to save the form.
- (Optional) Click the View Form button to view your form and test the multi-page process with progress bar.

Using conditional logic on multi-page forms
Conditional logic helps make your forms easier to use by hiding unnecessary fields and design elements until certain conditions are met.
When using conditional logic in multi-page forms, it’s important to know where the conditional logic should be applied to ensure you achieve the desired result.
How to skip an entire page using conditional logic
Add a Field Group element to your form, then drag all fields for this page (including any headings) into the field group.

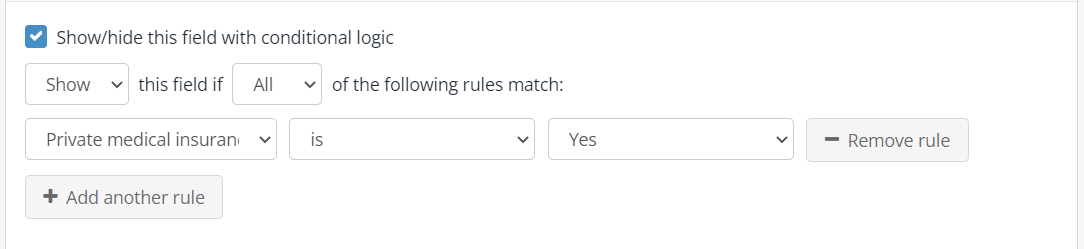
Now apply conditional logic to the field group by creating a rule that is based on a field outside of the field group. If conditions are not met, the page will be skipped.
How to prevent form users from proceeding to the next page
Appy your conditional logic to the Page Break element. If conditions are not met, the Next button will be disabled.
Viewing incomplete form responses
Incomplete form responses can be found in your dashboard along with a link to view and continue the form response. To learn more, see our help article: Viewing incomplete form responses