Take payments on your form with PayPal
Connect your form to your PayPal payment gateway to facilitate fast and secure customer payments via credit card.
Credit card information submitted by form users is encrypted and sent directly to PayPal for processing. Snapforms does not store any payment data.
Before you start
This guide assumes you’ve already created your online form using the drag-and-drop form builder.
If you’re new to Snapforms, we recommend you check out our 10-minute getting started video or have a look through our help guides to learn how to set up your form.
Obtain your PayPal API credentials
To connect Snapforms to PayPal, you will need to obtain your Merchant ID from your PayPal account.
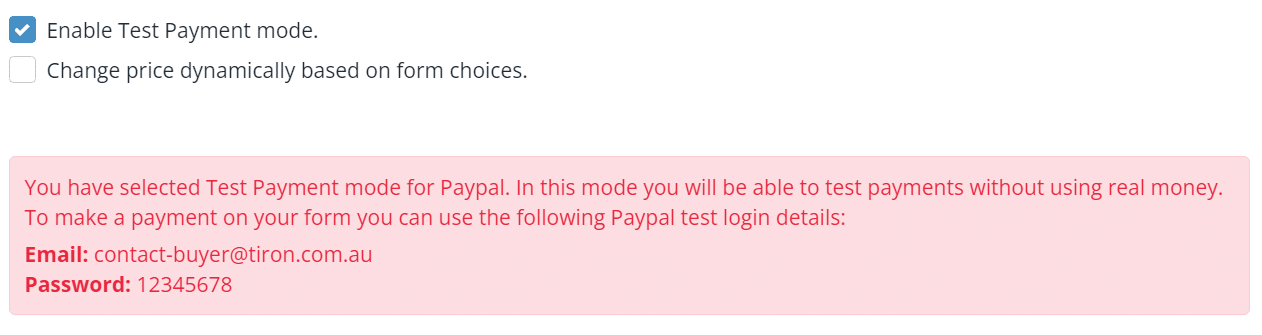
Test payment mode
If you want to try out the payment feature without linking to your PayPal account, you can use our test Merchant ID: 4VD24TLPBH7Y2.
When you add the payment field to your form, you can enable ‘Test Payment Mode’ which allows you to test the payment gateway using the PayPal login details shown on-screen.
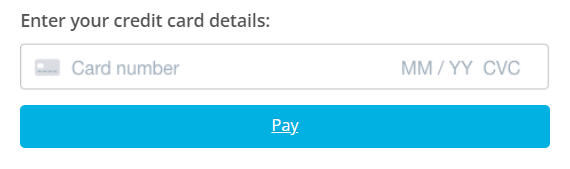
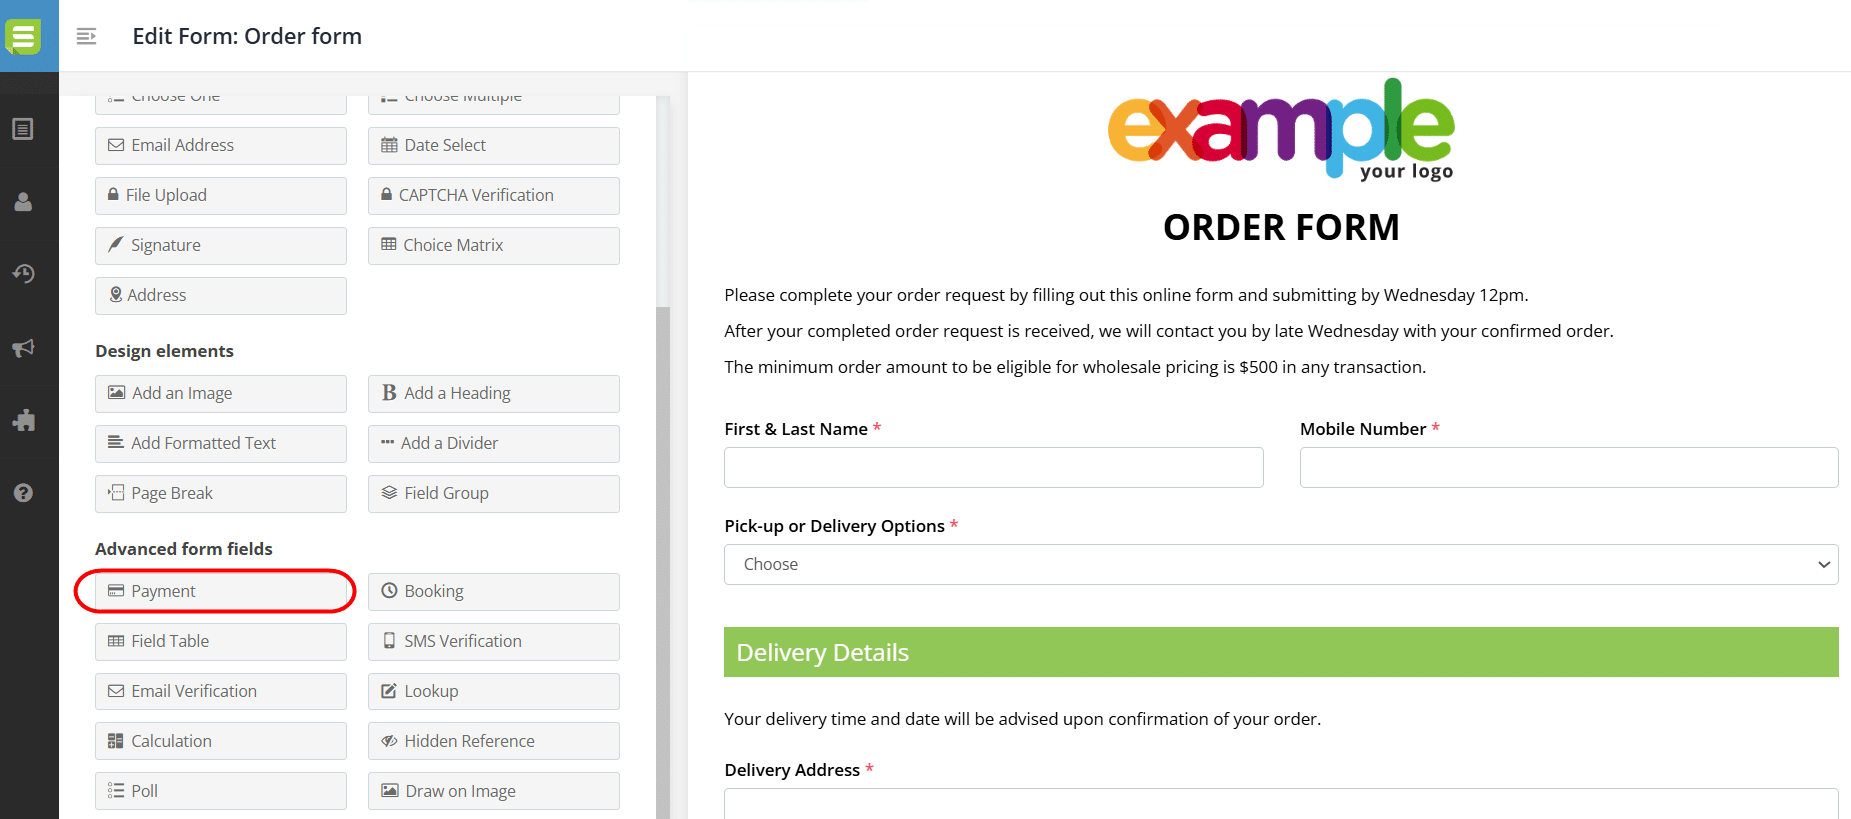
Add the Payment field to your form
- Click and drag the Payment field onto your form.

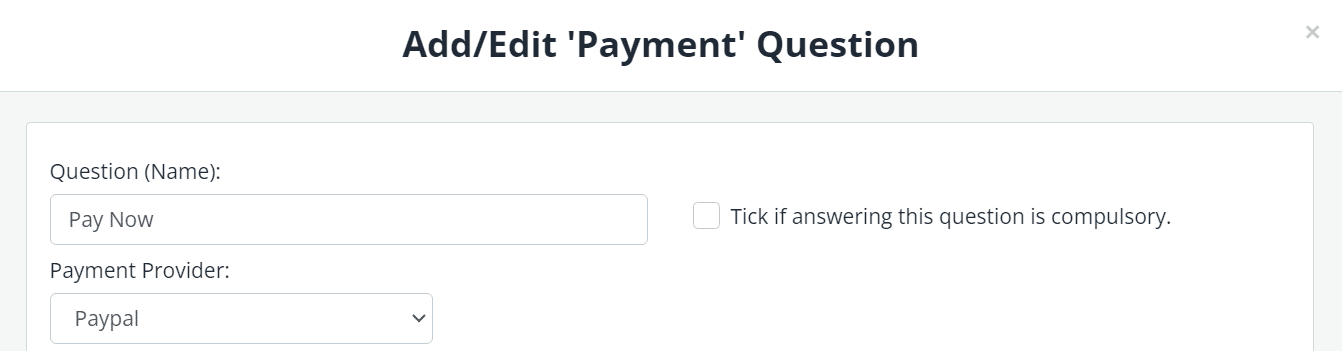
- In the Question (Name) field, enter an instruction such as ‘Pay Now’ or ‘Enter Credit Card Details’.
- (Optional) If the payment is required before submitting the form, select the Tick if answering this question is compulsory checkbox.
- In the Payment Provider field, select ‘PayPal’.

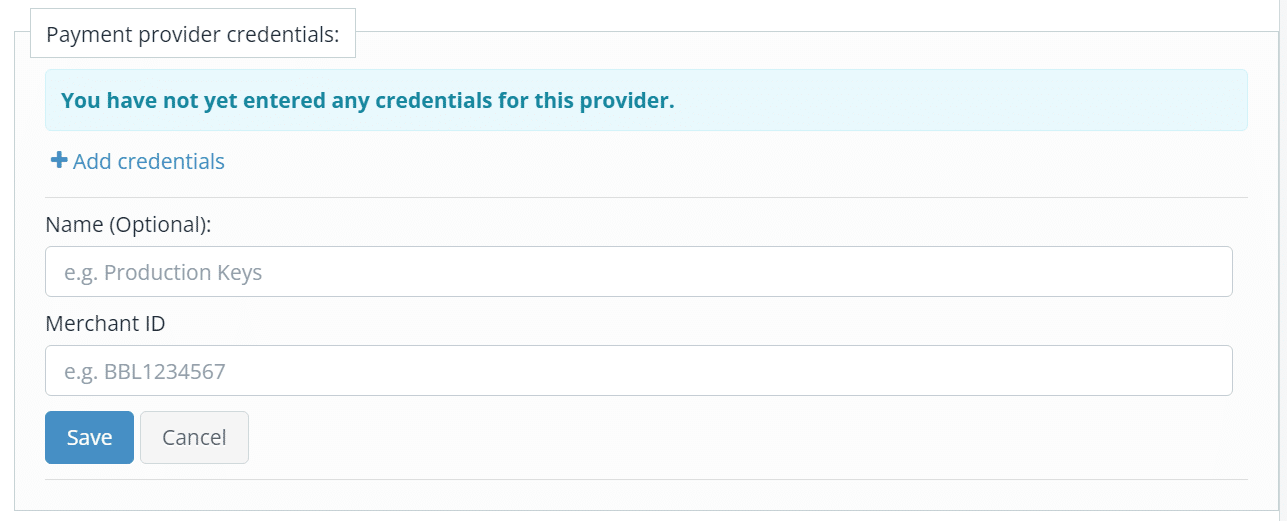
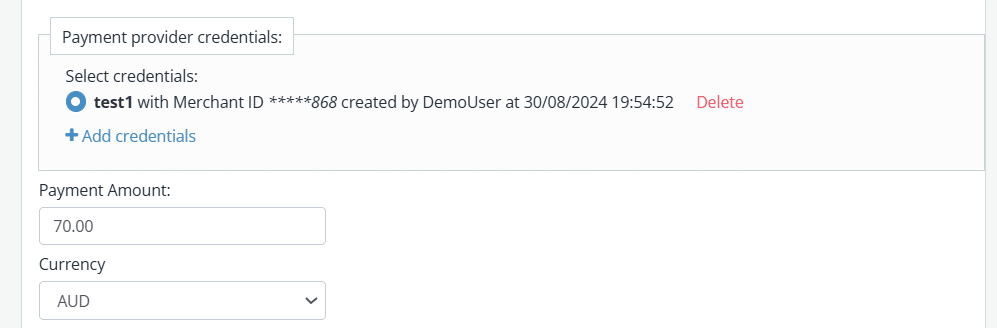
Add PayPal API credentials
- Click + Add Credentials.
- Enter the payment provider/API name, e.g. Sandbox or your live PayPal Account.
- Enter the Merchant ID. You can obtain this information from your PayPal account or use our test Merchant ID above.

- Click Save. Credentials for this payment provider are now saved and can be used across different forms.
- (Optional) Repeat the above steps to add another PayPal account, eg. Sandbox or your live PayPal Account.
Set your pricing
If you want to charge a set price (that does not change):
- Enter the payment amount, e.g 70.00.
- Set the default currency.

- Click Save & Close.
- Save and view your form.
Dynamic pricing
If you want to provide a range of price options in your form and have the payment amount dynamically change depending on the form user’s selection, follow these steps:
- In the Payment Amount field, enter a nominal value that will be overridden, e.g. 1.00.
- Select the Change price dynamically based on form choices checkbox.
- Click Save & Close.
- Add in the fields that will be used to determine the final payment amount. There are a few different ways to achieve this (choose one method only):
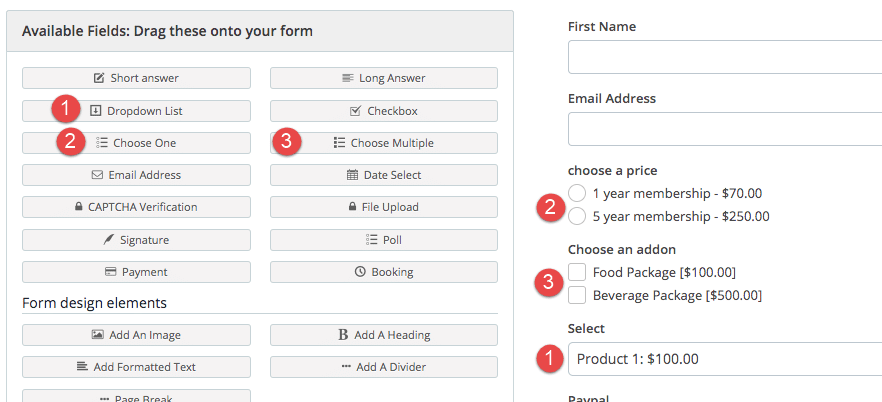
- Dropdown List, Choose One, or Choose Multiple fields – one or more of these fields can be used in cases where you want to present multiple product/pricing options. Each option must include a $ symbol as shown below.

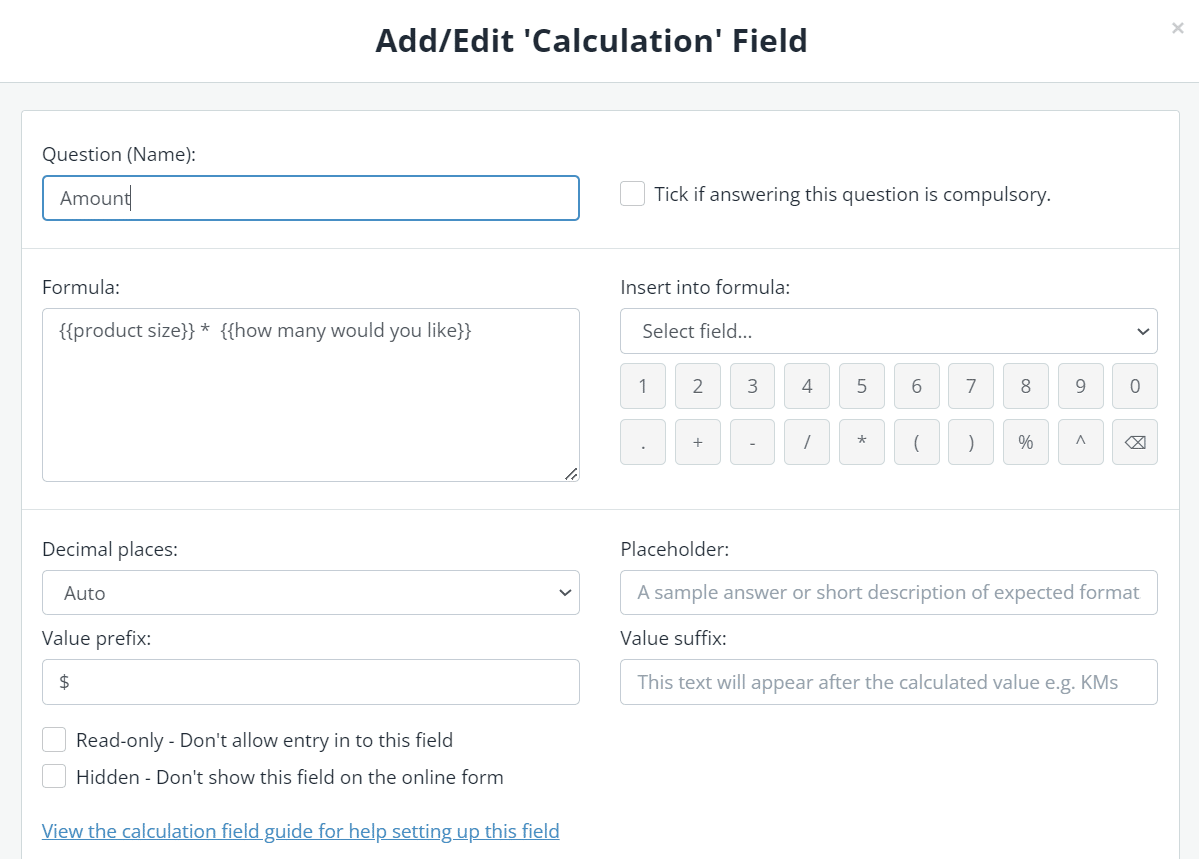
- Calculation field – Alternatively, you can assign numeric values (prices) to your product options and use a Calculation field to automatically calculate the payment amount based on a formula. The Question (Name) of this field must be ‘Amount’, otherwise it won’t be used as the final payment amount.

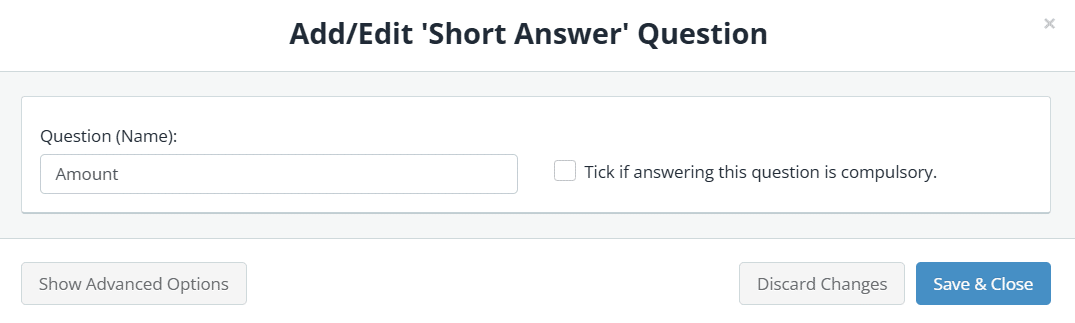
- Short Answer – can be used in cases where you want form users to manually enter a payment amount. The Question (Name) of this field must be ‘Amount’, otherwise it won’t be used as the final payment amount.

- Dropdown List, Choose One, or Choose Multiple fields – one or more of these fields can be used in cases where you want to present multiple product/pricing options. Each option must include a $ symbol as shown below.
- Save and view your form.