Calculation field
The Calculation field is used to automate calculations based on the information entered by a form user.
Instead of manually calculating form values, you can create a formula to perform simple or complex arithmetic calculations for:
- product orders
- event registrations
- employee surveys
- medical assessments and scores
- expense reimbursements, and more.
Set up your basic form first
Before adding a Calculation field to your form, you need to ensure all of the relevant fields that will be used in the calculation exist in your form.
If you’re new to Snapforms, we recommend you check out our 10-minute getting started video or have a look through our help guides to learn how to set up your form.
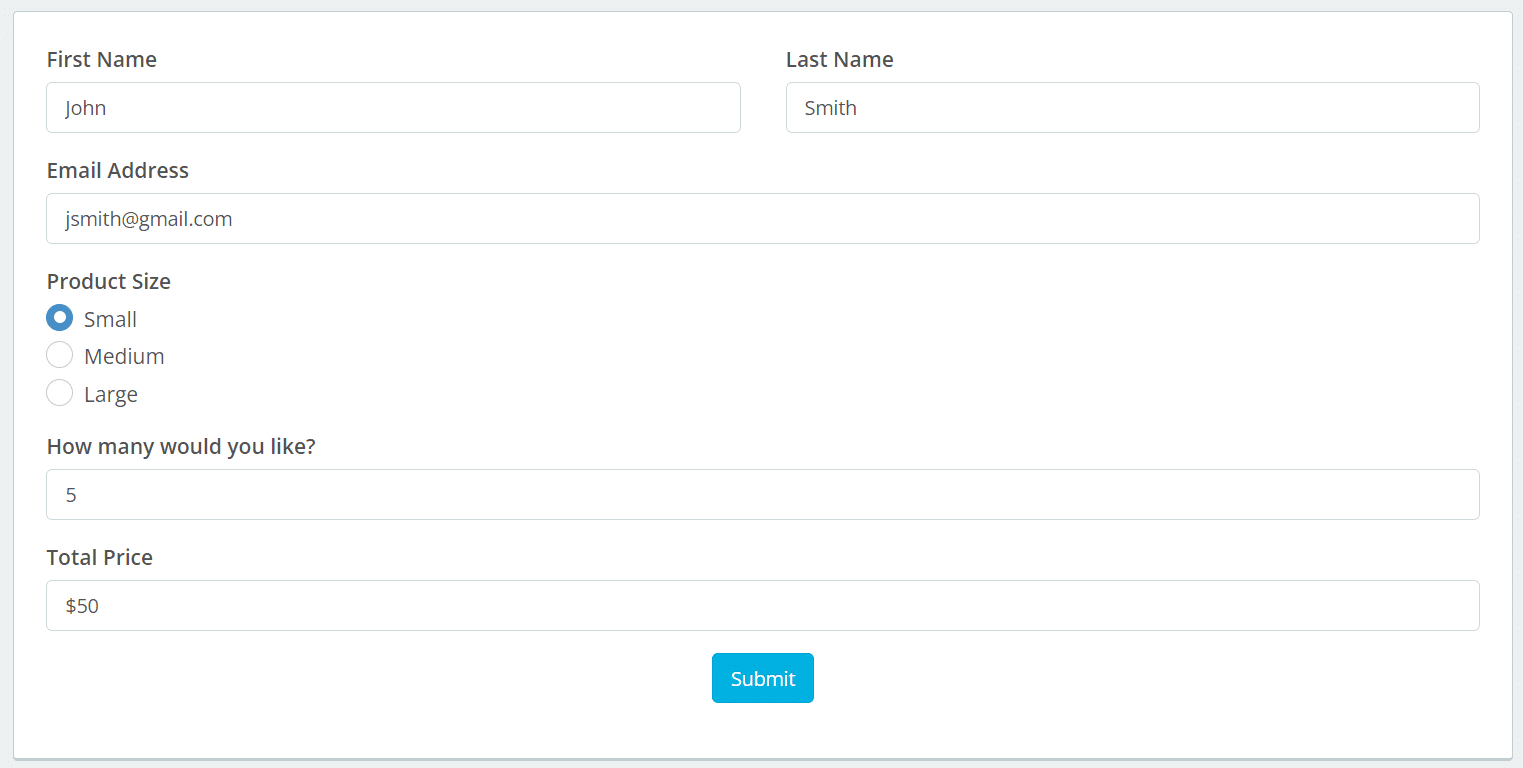
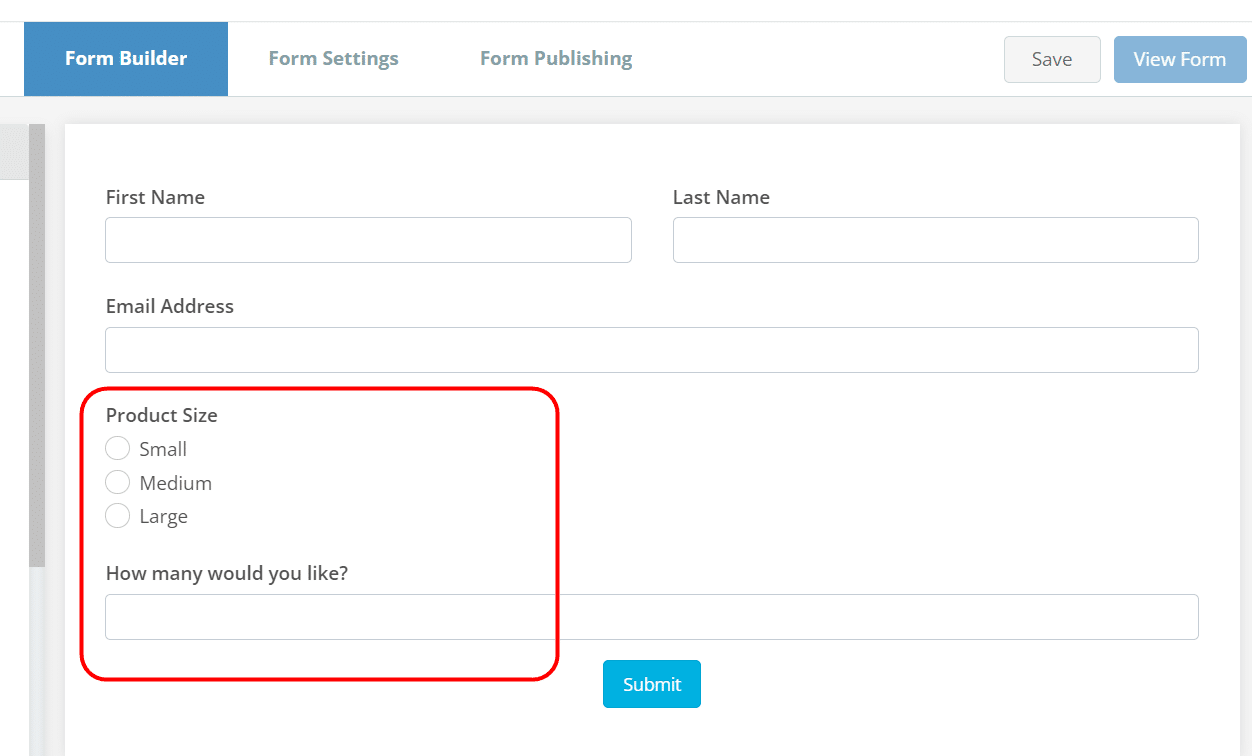
In our example form below, we’ve added two fields that allow the form user to select a product size and enter the quantity they need.
We’ll be using these fields in our calculation formula to calculate the total price of the selected products.
Assign numeric values to options
You will notice that our ‘Product Size’ field provides a range of options. For this field, we need to assign a numeric value to each option (Small, Medium, Large) that will be used to calculate the total price.
The next field ‘How many would you like?’ is a text box that allows form users to enter a value. The value entered will be used in our calculation.
Tip: When building your form, keep in mind that numeric values can only be assigned to answers/options when using the following field types: Choose One, Choose Multiple, Dropdown List, Choice Matrix, Checkbox.
To assign numeric values to answers/options:
- Hover over the field and click Edit Field Details.
- Click Show Advanced Options.
- In the Assign numeric values for your options textbox, enter a numeric value for each option and list them in the same order. For example:
- 10 (Small)
- 20 (Medium)
- 30 (Large)
- Save & Close.


Add the calculation field and set up the formula
Now that we’ve set up our initial form fields and have assigned numeric values to our options, we can add the Calculation field and start building our formula.
- In the Advanced Form Fields menu, click and drag the Calculation field onto the form.
- Enter the field name, e.g. Total Price.
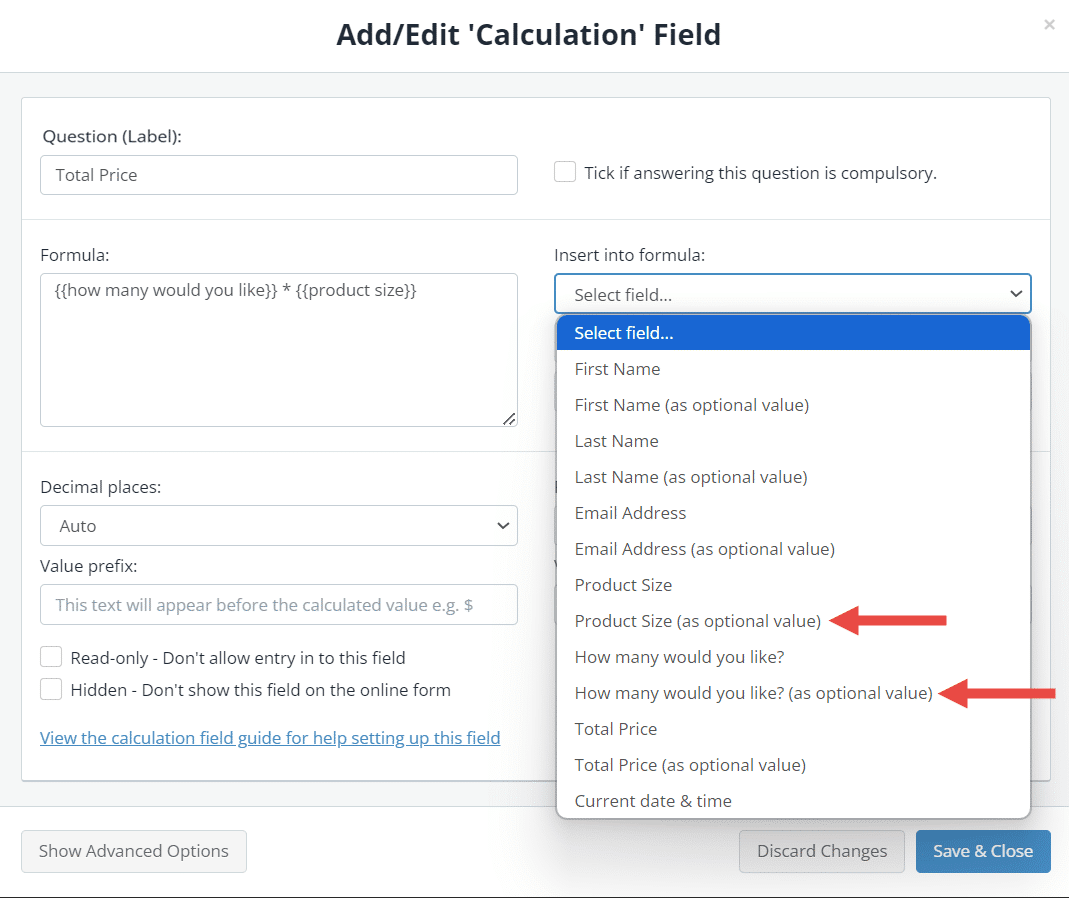
- Select the relevant fields from the Insert into formula dropdown list.
- Use the symbols underneath (or use your keyboard) to insert the relevant mathematical operators into the formula:
- + for addition
- – for subtraction
- * for multiplication
- / for division
- ( ) brackets for building multiple nested formulas in one.
- Apply the optional settings you require.
- Click Save & Close.
In our example below, we inserted the ‘How many would you like?’ field, typed a * symbol for multiplication, and then inserted the ‘Product Size’ field.
The quantity multiplied by the product size cost will give us the total price.
Note: In the ‘Insert into formula’ dropdown list, you’ll see each field is listed twice. If you choose the ‘(as optional value)’ version, the formula will calculate with or without the form user selecting an answer for that field.
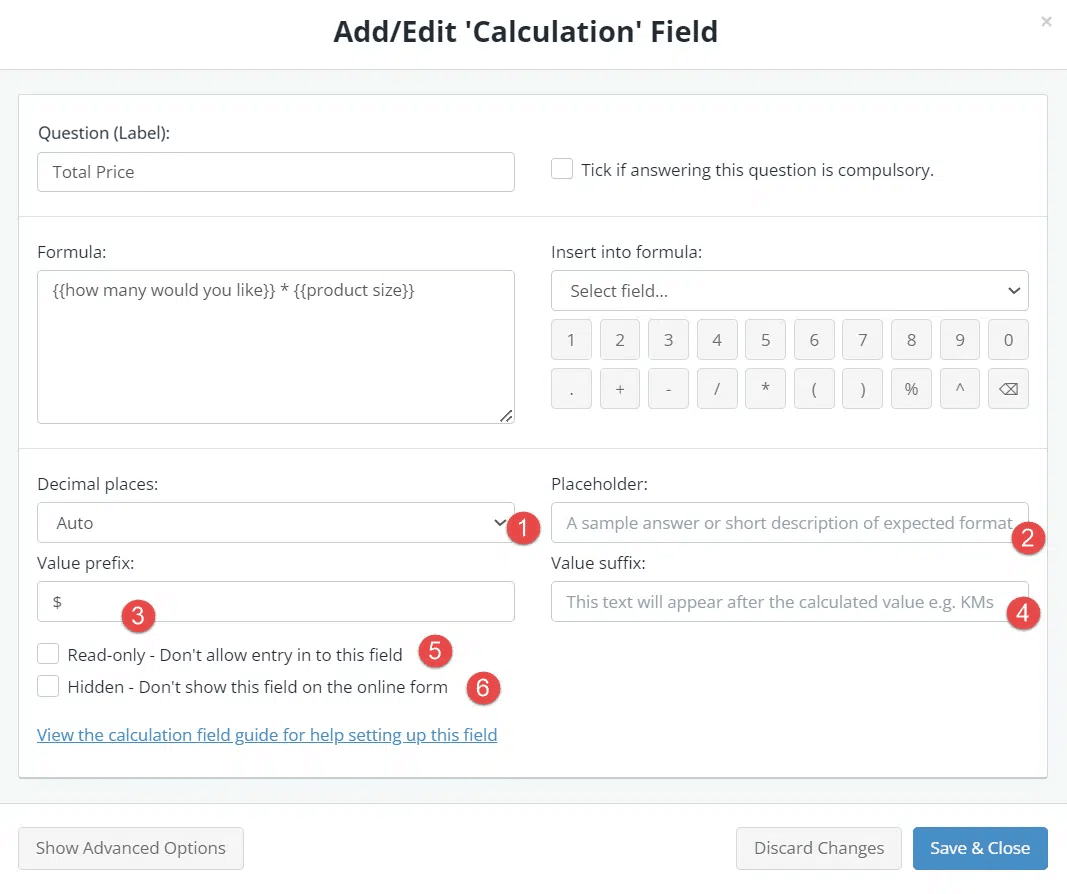
Optional settings explained
| No. | Setting | Description |
| 1 | Decimal places | Determines the number of decimal places the result will have. |
| 2 | Placeholder | Placeholder description that will appear inside the calculation field before the calculation is performed. |
| 3 | Value prefix | Displays a prefix in front of the final calculated value, e.g. $ or other currency symbol. |
| 4 | Value suffix | Displays a suffix at the end of the final calculated value, e.g. per month, dollars, etc. |
| 5 | Read-only – Don’t allow entry in to this field | Tick this if the calculation value should be ‘read-only’ on the form, which means the form user cannot change it. |
| 6 | Hidden – Don’t show this field on the online form | Tick this if the calculation field should not be visible to form users, and only visible to you when you receive the submission. |
Example formulas
You may use operators for all common arithmetic operations and conditional expressions.
| Operator | Name | Example Formulas |
| + | Add | {{product price}} + {{fee}} |
| – | Subtract | {{hours worked}} – {{breaks}} |
| * | Multiply | {{quantity}} * {{product price}} |
| / | Divide | {{people}} / {{tables}} |
| ^ | Power | {{interest}} ^ {{percentage}} |
| ? : | Conditional expression | {{age}} == 18 ? “you are 18” : “you are not 18” |
| == | Equal | {{age}} == 18 ? “you are 18” : “you are not 18” |
| != | Unequal | {{age}} != 18 ? “you are not 18” : “you are 18” |
| < | Smaller | {{score}} < 10 ? “Low” : “High” |
| > | Larger | {{score}} > 10 ? “High” : “Low” |
| <= | Smaller or equal to | {{hours}} <= 7 ? “you have 7 hours or less” : “you have more than 7 hours” |
| >= | Larger or equal to | {{hours}} >= 7 ? “you have at least 7 hours” : “you have less than 7 hours” |
| to, in | Unit conversion | {{minutes}} minutes to seconds
{{hours}} hours to minutes {{seconds}} seconds to years {{length}} cm to meters |
| and | Logical and | {{age}} > 18 and {{age}} < 65 ? “Adult” : “Other” |
| or | Logical or | {{priority}} == 1 or {{priority}} == 2 ? “High” : “Low” |
| ( ) | Grouping | {{hours}} * ( {{minutes}} / 60 ) |
Using IF statements within calculations
You can use IF statements within your formula to determine outcomes based on multiple scenarios.
The format for an IF statement is:
CONDITION ? RESULT IF TRUE : RESULT IF FALSE
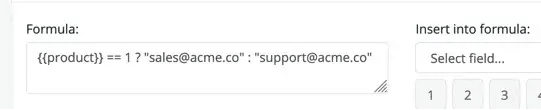
The example below shows an IF statement in action where the result is text. As the result is in text we have surrounded it with quotation marks ”
The formula depicts: “IF the product has a value of 1, THEN the result is “sales@acme.com”, ELSE the result is “support@acme.co”
There may be cases where you need to calculate a result based on multiple IF ELSE IF scenarios.
The format for chaining multiple if / else if statements is:
CONDITION ? RESULT IF TRUE : NEXT CONDITION ? RESULT IF TRUE : NEXT CONDITION ? RESULT IF TRUE : RESULT IF FALSE
The example below shows an IF / ELSE IF statement with multiple scenarios resulting in different text results.
The formula depicts: “IF age is less than 12, THEN the result is “you are a child”, ELSE IF age is less than 18, THEN the result is “you are a teenager”, ELSE IF age is less than 65, THEN the result is “you are an adult”, ELSE the result is “you are an older adult”.

Nested formulas
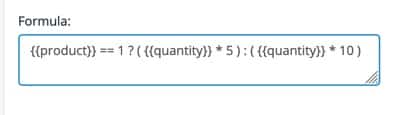
You can use brackets to nest formulas within formulas.
The formula below depicts: “IF the product chosen has a value of 1, THEN the result should be the Quantity times 5, otherwise the result should be the Quantity times 10.”
Calculating dates
You can calculate the time between two ‘date’ fields by inserting the date fields into your formula as normal. The result will be in seconds, so you need to divide it if you want minutes, days, years or something else.
The example below calculates the minutes between two dates.

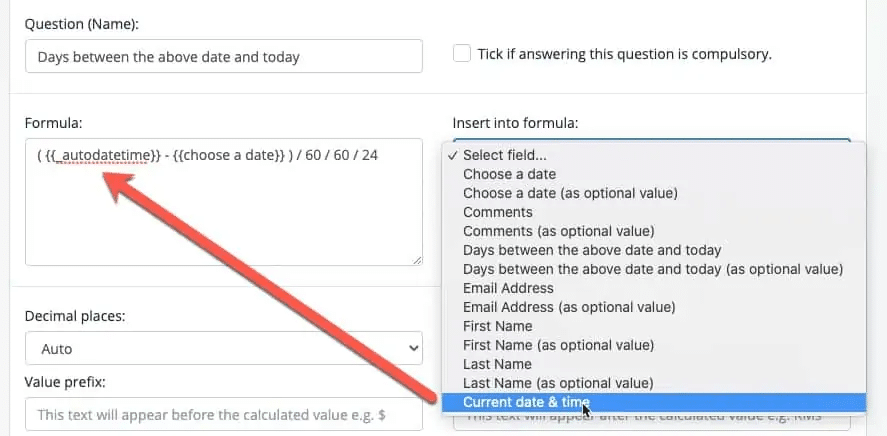
To calculate the time between a specified date and the current date, you can insert the ‘Current date & time’ field from the field drop down. The result will be in seconds, so you will need to divide it if you want minutes, days, years, or something else.
The example formula below will calculate the number of days between the selected date and the current date.
Age calculation using date of birth
If your form has a ‘Date of Birth’ field and you want to auto-calculate the age, you can achieve this by using a Calculation field with the following formula and settings:
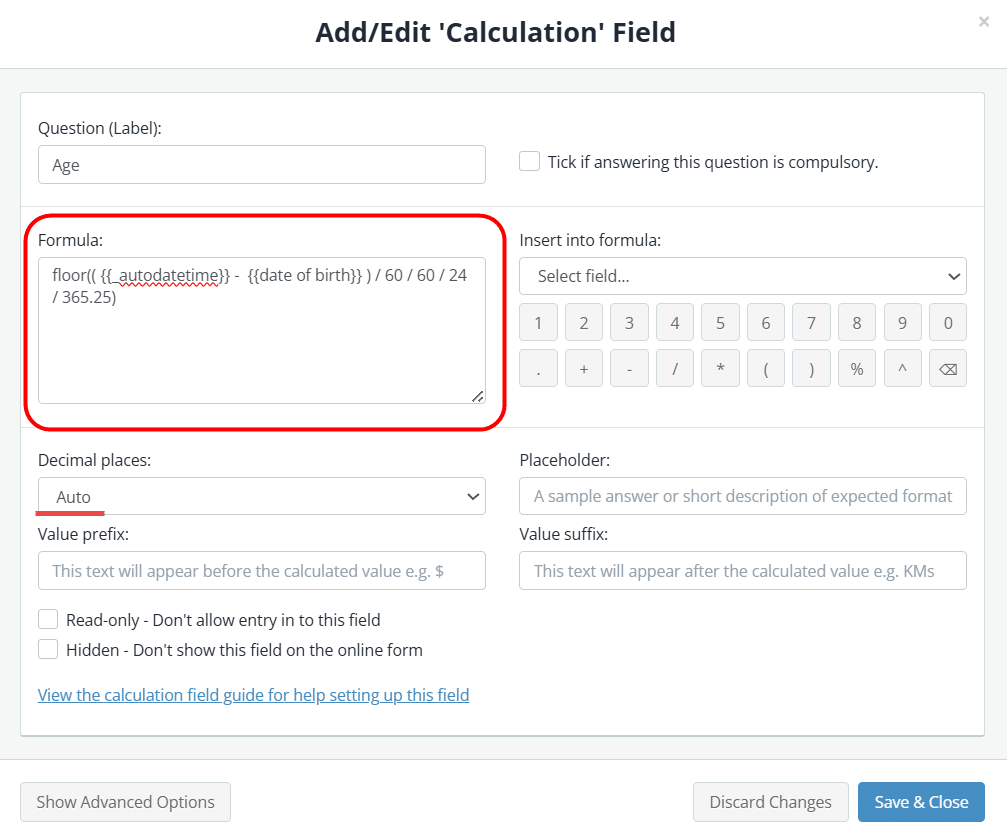
By adding the floor() function to your formula, the result will always be rounded down to the nearest whole number.
Troubleshooting
Automated score not updating
If you are using a Calculation Field in conjunction with a field that supports numeric values (Choose One, Choose Multiple, Choice Matrix, or a Dropdown List), and notice that the score isn’t updating when respondents select answers, check for these common issues:
- Numeric values have not been entered into the field’s Advanced Options > Assign numeric values for your options box. See steps above for assigning numeric values.
- The Calculation field formula contains additional ‘blank’ spaces. This can occur when using a long formula with multiple field name references. Remove any extra spaces from the Calculation field formula.
- The Calculation field name contains a special character such as a dash. Remove any special characters from the Calculation field name.
Note: If you want to calculate subscales or more than one calculation, you will need to use a Choose One, Choose Multiple, or Dropdown List field.
The Choice Matrix field will only allow you to calculate one value based on all of the questions and choices within the matrix. You are unable to pick and choose which fields to include in the formula.