
Power Automate Setup
Microsoft Power Automate (previously Microsoft Flow) is available as part of Office 365 and allows you to connect over 300 data sources to automate repetitive business tasks and processes.
With the certified Snapforms connector available in Power Automate, you can instantly route form responses to the business systems you already use and trigger automated workflows seamlessly.
Power Automate apps and services include:
- OneDrive
- Outlook 365 mail or calendar
- SharePoint
- MS Teams
- Excel
- Access
- Dropbox
- Google Drive
- Gmail
- Sql
- Dynamics
- Local file storage
- Power BI
Note: This feature is available in Snapforms’ Professional plan and above.
How to connect Power Automate to Snapforms
- Sign into your Power Automate account.
- Go to More > Connections.
- Click + New Connection.
- Search for Snapforms.
- Click the + (plus symbol).

- Click Create.
- A Snapforms Authorisation Request popup window should appear. If you’re not logged into Snapforms, you will be prompted to log in to complete the authorisation.
- Click Authorise.

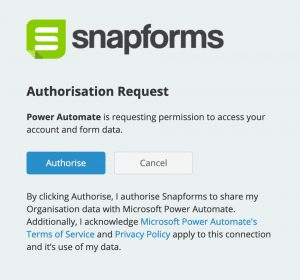
The connection is now set up and you’re ready to start creating flows with Snapforms in Power Automate.
How to use Snapforms in your flows
The most common scenario for creating a flow with Snapforms is to trigger an action in another system when a form response is submitted in Snapforms.
This often involves automatically sending answers from a form response to another system.
To create a flow with Snapforms in Power Automate:
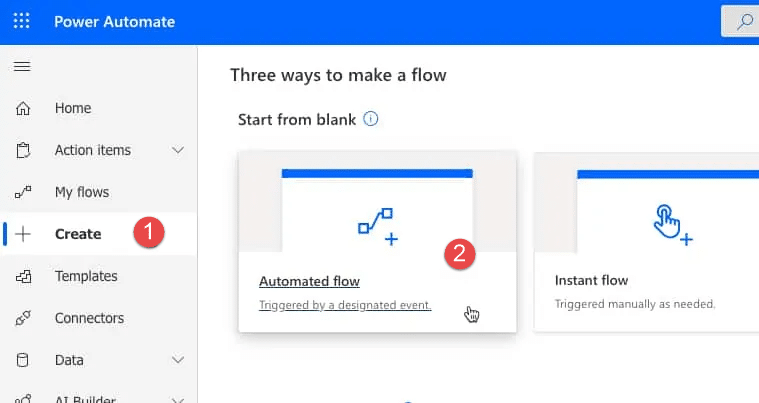
- Click Create in the side menu.
- Click Automated flow.

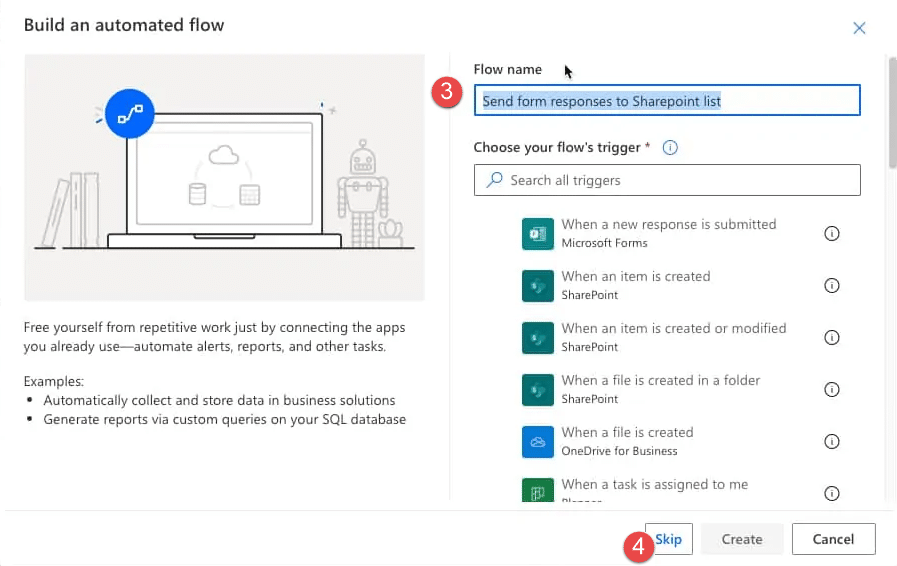
- Enter a Flow name of your choice.
- Click Skip.

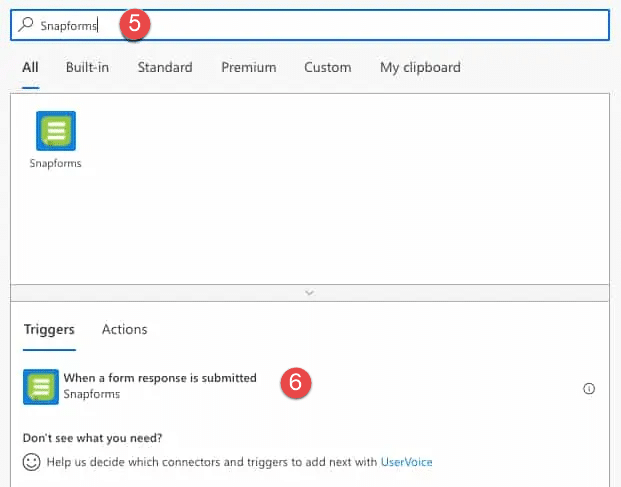
- Search triggers: Snapforms.
- Select the trigger: When a form response is submitted.

- Select the relevant form from the list.
- Now you can choose the action that you want to happen automatically when a form response is submitted.

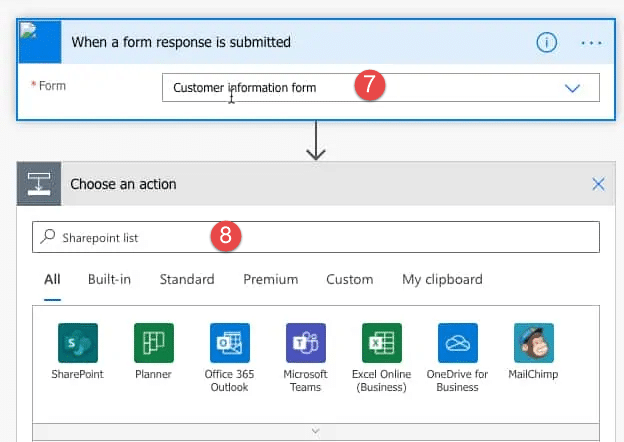
Examples of actions
Power Automate allows for thousands of different actions across hundreds of systems. You can choose to connect your form data with any of these actions.
The following example is a basic action that will give an overview on using the Snapforms trigger and dynamically using form answers within an action.
Example: Send an email containing data from your form response
In this example, we want to send an email from Power Automate containing some of the information from our form response in Snapforms.
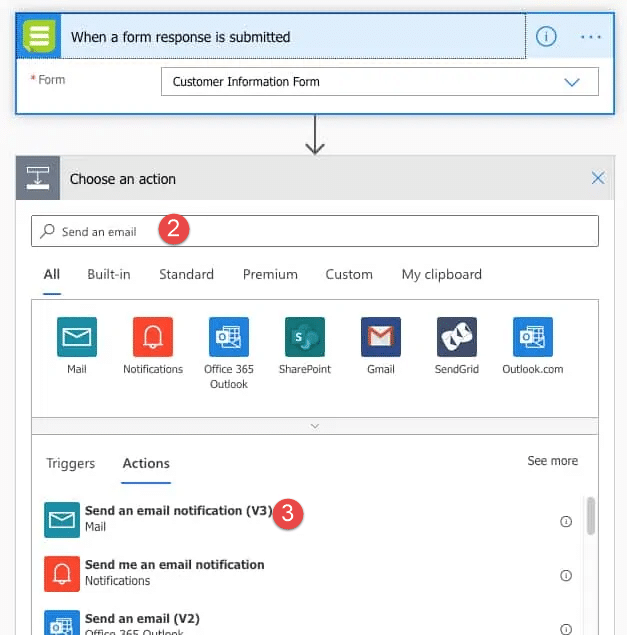
- Complete steps 1-7 above.
- Search for: Send an email.
- Select the ‘Send an email‘ action for the service you’d like to use (e.g. the default Power Automate mail service)

- Enter a To address, Subject and Body text.
- Using the Dynamic Content window, you can add dynamic content from your form response to the To, Subject or Body fields.

- Click Save to complete the setup.
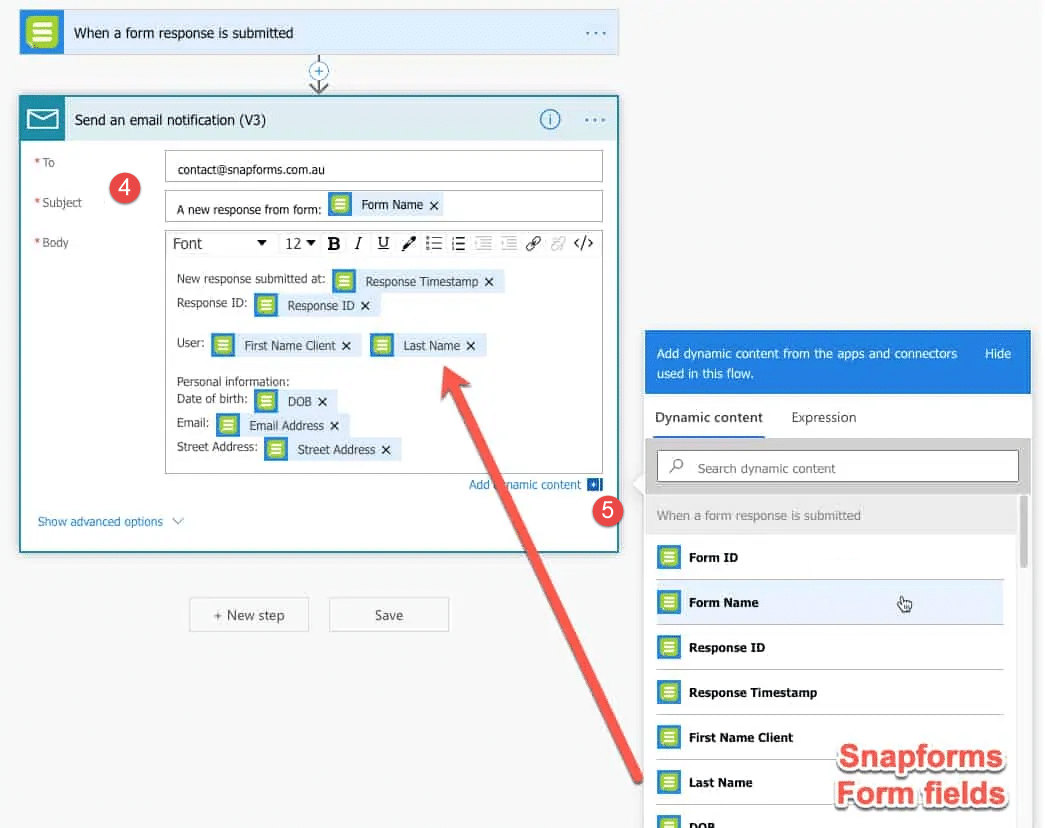
Each time the nominated form is submitted, you should now receive an email containing the details you’ve set up.
Further examples of actions
Here are some more examples of specific systems you can integrate with as well as commonly-used functionality which can be applied to many different systems.