Auto-reply emails
Auto-reply emails are a great way to confirm receipt, say thank you, or send extra information to people who have completed your forms.
Using the rich-text editor, you can easily design a professional-looking email that includes banner images, tables, formatted text, and more. You can even personalise the email content using shortcodes that pull data from submitted forms.
Plus, there’s a range of handy options that allow you to control form response attachments and email delivery.
Set up an auto-reply email
Before setting up an auto-reply, you will need to ensure that there is at least one Email Address field in your form. The auto-reply email will be sent to the email address that the form user enters in the first ‘Email Address’ field on your form.
- Go to Form Settings > Notifications > Auto Reply Email.
- Tick Send users an automatic response when they submit the form.

- (Optional) Auto-reply emails are sent from ‘no-reply@snapforms.com.au’ by default. You can select a different Sender Email Address that will appear as the ‘From:’ email address on auto-reply emails. Note: Administrator users can add new custom sender emails to this list via the Manage Sending Addresses link. This requires domain verification. To learn more, see our custom sender domain guide.
- (Optional) Enter the Sender Name that you want to appear as the ‘From:’ name on the auto-reply email, e.g. Sharon from Bob’s Plumbing
- Enter the Email Subject that you want to appear as the ‘Subject:’ on the auto-reply email, e.g. Thanks for your feedback!
- In the Email Body, you can design your message using the rich-text editor toolbar. To personalise the content, click insert form answers and copy/paste the relevant short-codes into your message, e.g. {{first name}}
- (Optional) Enable any response attachment options you require.
- (Optional) Enable any email delivery options you require.
- Scroll back to the top and click Save.

Response attachment options explained
| Option | Description |
| Include a copy of responses at the bottom of the confirmation email | Adds a list of form fields and their responses to the bottom of the form submitter’s auto-reply email (within the email body). |
| Attach a PDF document containing form responses | Attaches a PDF copy of the form responses to the form submitter’s auto-reply email.
If you want to customise the default PDF document, see our PDF templates guide. |
| Add file uploads as attachments to email (max 20MB) | Includes any uploaded files as attachments to the auto-reply email. By default, secure links to the uploaded files are automatically included in the body of the auto-reply email. |
Email delivery options explained
| Option | Description |
| Delay sending email after form completion instead of sending immediately | Delay sending the auto-reply email for a specified period.
This is useful for sending workflow reminder emails. |
| Enable conditional logic for this email | Only send the auto-reply email when certain conditions (responses) are met in other fields on the form.
To learn more, see Show or hide fields using conditional logic. |
Troubleshooting email delivery
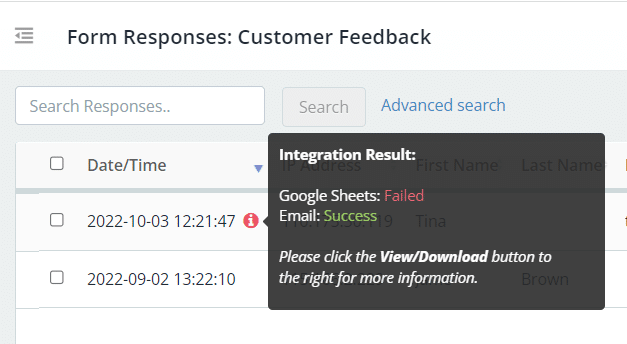
If you’re unsure whether your emails are working correctly, you can check the email delivery status in the form responses list.
- In the main menu, click Forms.
- On the form, click Actions > View Responses.
- Mouse over the information icon to view integration results.

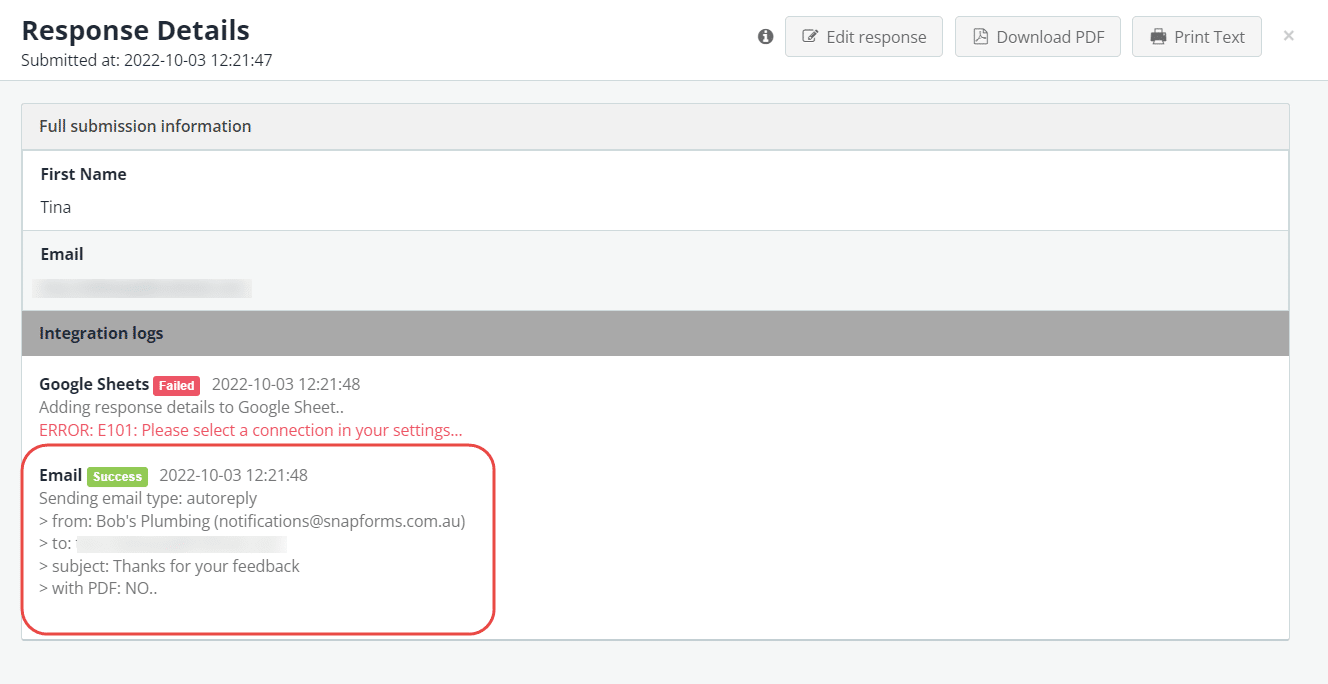
To see more details about the email delivery status:
- Next to the form response, click View/Download.
- Scroll to the bottom of the response details to the integration logs.