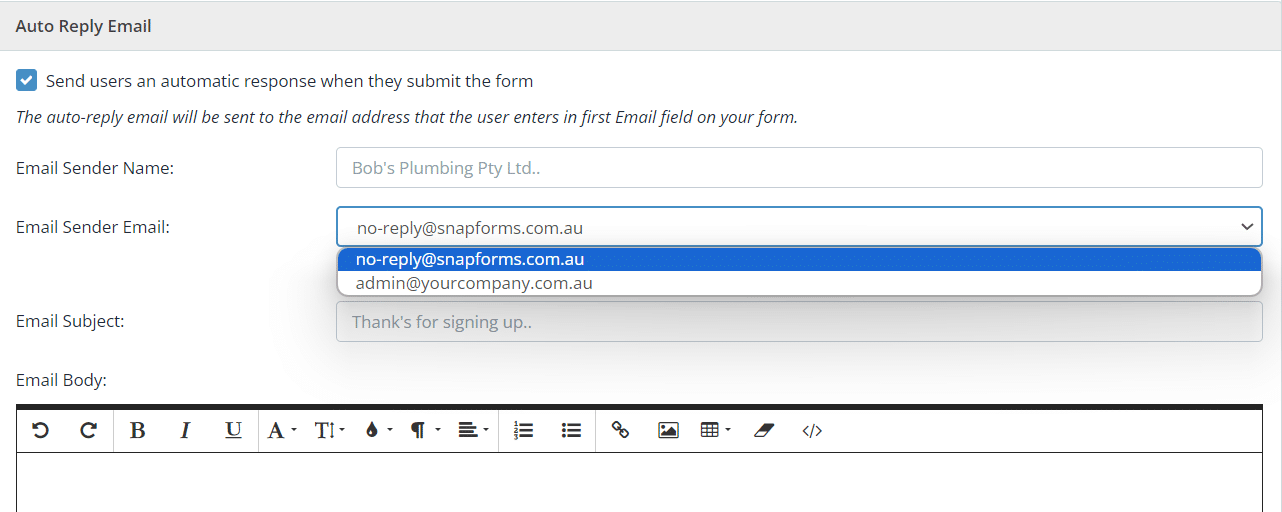
Custom sender domain for auto-reply emails
When setting up an auto-reply email for a form, you can specify a custom sender email which will be displayed as the ‘From:’ email address on the auto-reply email.
For example, you may want your auto-reply emails to show that they’re sent from your company email address, e.g. admin@yourcompany.com.au
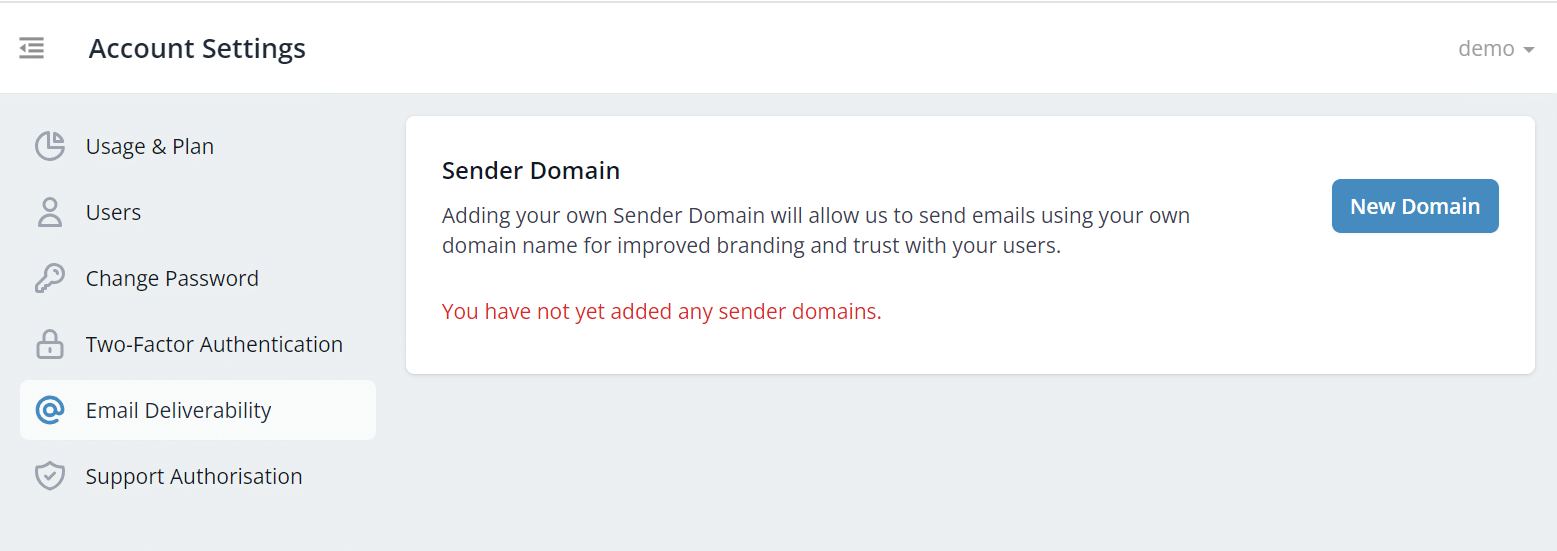
Adding and verifying your sender domain name (e.g. yourcompany.com.au) in your Account Settings allows Snapforms to send emails from your nominated email address. Email deliverability will be improved as a result of DMARC validation for SPF and DKIM alignment.
Tip: Alternatively, you can set up your auto-reply emails to be sent from ‘no-reply@snapforms.com.au’ which doesn’t require domain verification.
Add a custom sender domain
- Go to your username (top right of screen) > Account Settings > Email Deliverability
- Click New Domain.

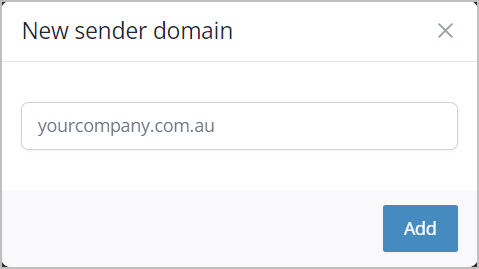
- Enter your sender domain name, e.g. yourcompany.com.au

Note: Do not enter the full email address or any DNS codes here – only the domain name is required.
- Click Add. This will generate the DNS verification settings for your custom sender domain (example shown below). You must provide these settings to your IT team or domain name provider to set up.

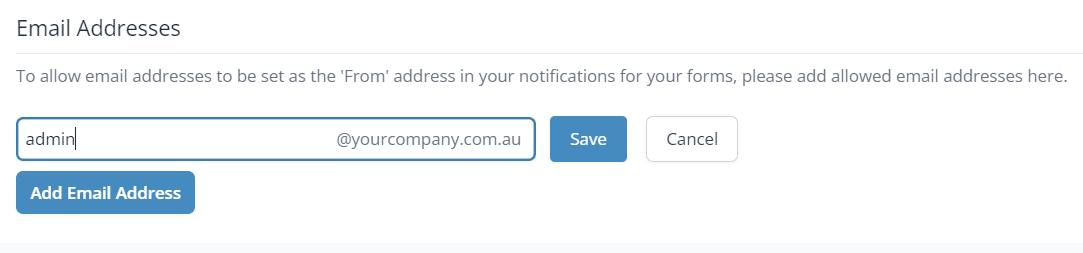
- To allow a custom sender email address to be set on form notifications or auto reply email settings, click Add Email Address.
- Enter the sender email address prefix only, e.g admin.

- Click Save.
- Close the window.
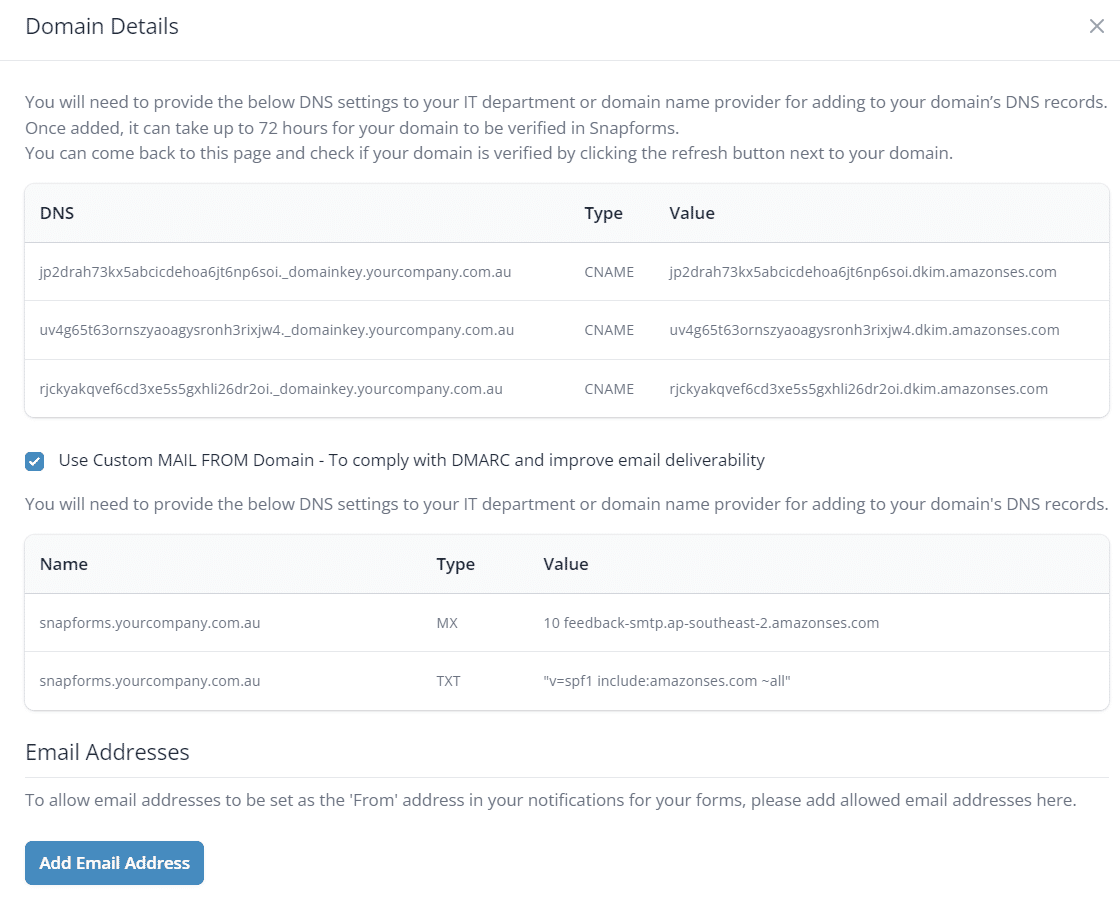
Update your DNS records
You will need to provide the generated DNS settings to your IT department or domain name provider for adding to your domain’s DNS records.
To view the generated DNS settings, click the settings icon.
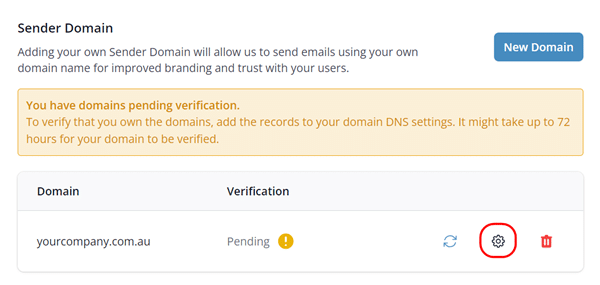
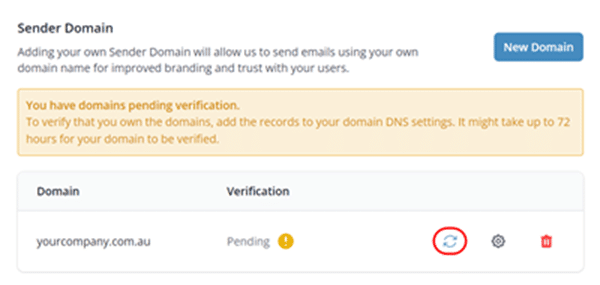
Check domain verification
It can take up to 72 hours for your domain to be verified in Snapforms. You can come back to this page and check if your domain is verified by clicking the refresh icon.
Once your domain is verified, auto-reply emails for your forms will start sending from the sender email you’ve specified in Form Settings > Notifications > Auto Reply Email.
Troubleshooting
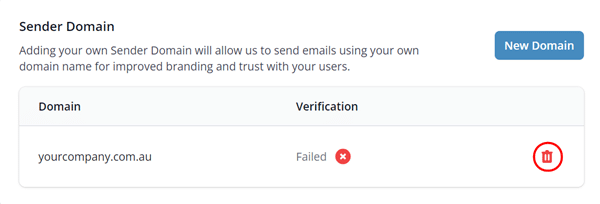
Failed verification
Domain verification will fail if our system does not see that the generated DNS settings have been added to your domain’s DNS records within 72 hours.
If you need assistance with updating your domain’s DNS records, please contact your IT department or domain name provider.
If your domain verification has failed:
- Click the delete icon on the right-hand side to remove it.

- Click the New Domain button and enter the same domain name.
- Click Add.
- If you have not already done so, copy the generated DNS settings and add them to your domain’s DNS records.
Please allow a few hours for the DNS records to propagate and for our system to recognise the change.
Once verified, a green tick will be displayed next to your new sender domain name.