Customising the Form Responses View
Form submission data is displayed in a table format on the Form Responses page. You can customise the table view by applying filters to view or export the data you need, such as responses from a certain date range or with specific answers.
Custom views can be saved for future use, either as private views for your own use or shared views accessible to others in your organisation.
To customise a form responses view:
- Navigate to the Form Responses page via your Dashboard or the Forms list.
- On the Form Responses page, click More Filters.

- Choose a date range from the dropdown list or leave as ‘All Time’.
- To remove columns from the table view, click Show/Hide Columns and uncheck the columns you want to remove.
- To filter the response data, enter a keyword into one or more columns. Click the x to remove filters individually, or Clear All to remove all filters.

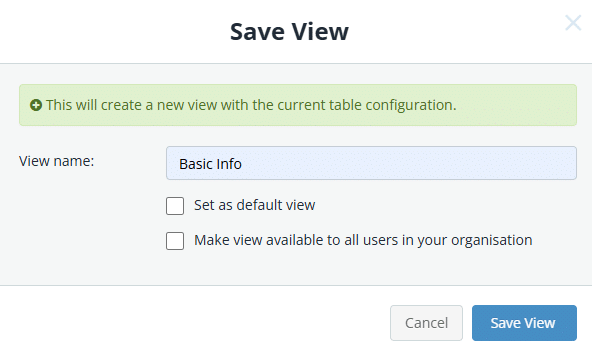
Saving a view
After customising your form responses filter settings, you can save them as a private view or share the view with all users in your organisation.
To save a custom view:
- Click Save View.

- Enter a unique view name.
- (Optional) To make this view your default view, enable Set as default view.
- (Optional) To make this view available to all users, enable Make available to all users in organisation.
- Click Save View.

Loading a saved view
To load a saved view:
- At the top of the Form Responses page, click Load View.
- Select the view from the list.

- Click x on the green Current View tag to return to the default view.

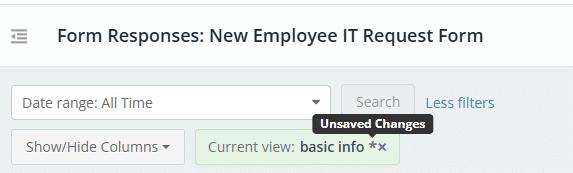
Updating a saved view
If you make changes to the current loaded view, you will see an asterisk appear on the green Current View tag that indicates unsaved changes.
To save changes to the current loaded view:
- At the top of the Form Responses page, click Update View.

- (Optional) Modify the existing settings if needed.
- Click Update.

To save changes as a new view:
- At the top of the Form Responses page, click Save View As.
- Enter a unique view name.
- (Optional) To make this view your default view, enable Set as default view.
- (Optional) To make this view available to all users, enable Make available to all users in organisation.
- Click Save As.
