
Cliniko Integration Setup
Snapforms allows clinics and allied health practitioners to create secure digital forms for patient registration, intake, referrals, signed consent, assessments and more.
With the Cliniko practice management integration, Snapforms can automatically add and update patient files in Cliniko using the information provided in your patients’ form responses.
| In this guide: |
How does the Cliniko integration work?
- When a patient submits a completed form, it’s automatically synced to their file in your Cliniko account.
- Got a new patient? No problem! Once they submit an intake, registration, or referral form, a new patient file is automatically created in your Cliniko account with all their details filled in.
- Existing patient files can also be automatically updated via forms that are connected to Cliniko.
- For both new and existing patient files, a PDF copy of the form is saved in their Cliniko patient file.
How to set up the Cliniko integration
Before you start
This guide assumes you’ve already created your online form using the drag-and-drop form builder. Please ensure your form has all the fields required for adding and updating patient files in Cliniko.
If you’re new to Snapforms, we recommend you check out our 10-minute getting started video or have a look through our help guides to learn how to set up your form.
Obtain a Cliniko API key
To connect Snapforms to Cliniko, you will need to generate an API key via your Cliniko account. Please refer to Cliniko’s help article for instructions.
Once you’ve obtained the API key, log into Snapforms and configure the following integration settings on your form.
Enable Cliniko integration and link account
- Open your form in edit mode.
- Navigate to the Form Settings tab > Integrations.
- Select the Cliniko checkbox.
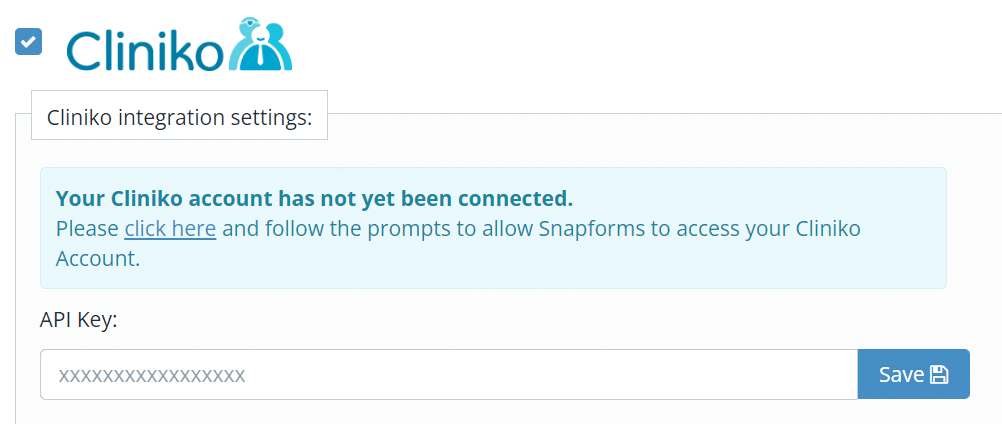
- If this is the first connection, click the click here link to display the API Key field.

- Paste your Cliniko API key, then click Save. This API key is now saved and can be used across different forms.
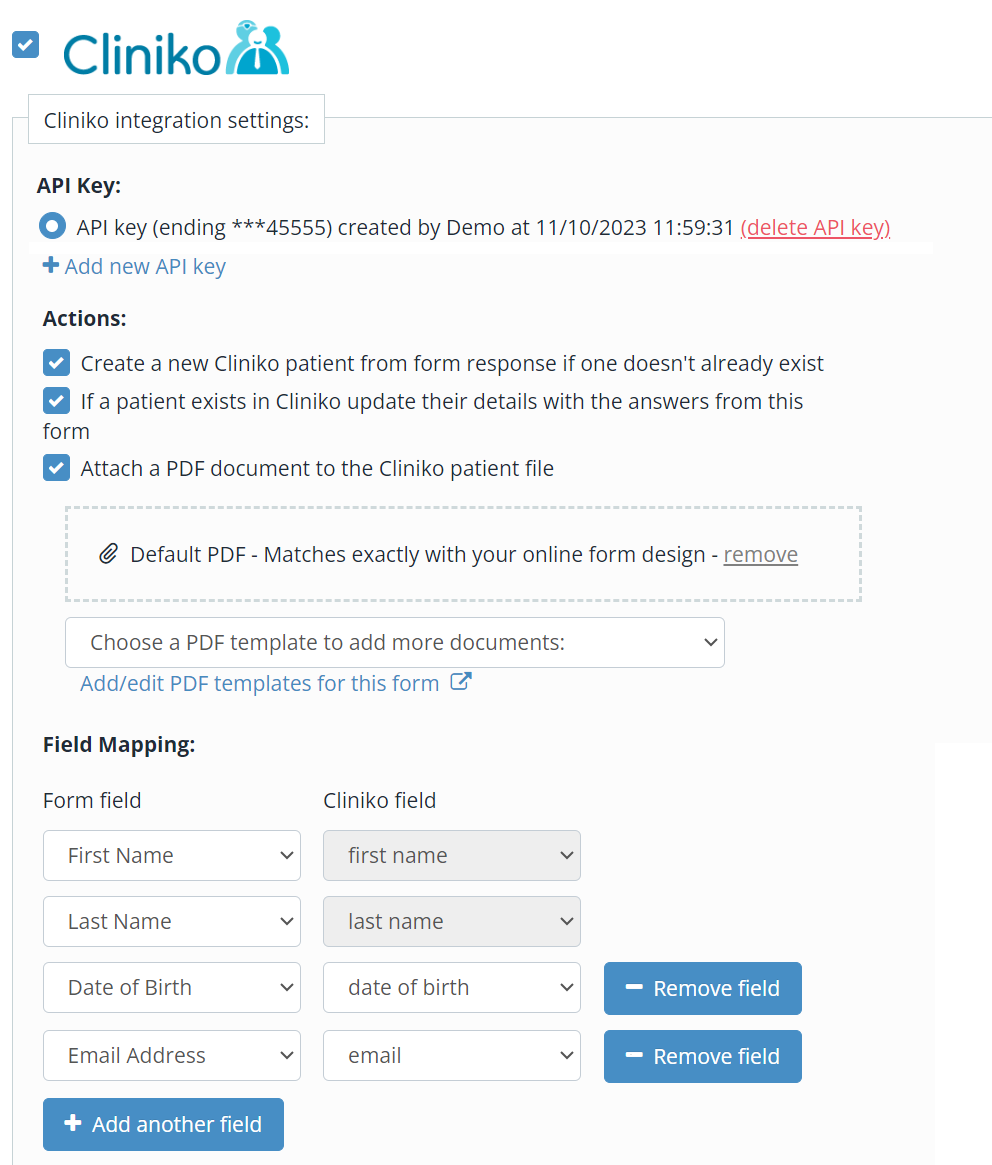
- Enable the integration actions you require:
| Action | Description |
| Create a new Cliniko patient from form response if one doesn’t already exist | Creates new patient files in Cliniko using the mapped fields from the form responses. |
| If a patient exists in Cliniko update their details with the answers from this form | Updates existing patient files in Cliniko using the mapped fields from the form responses. |
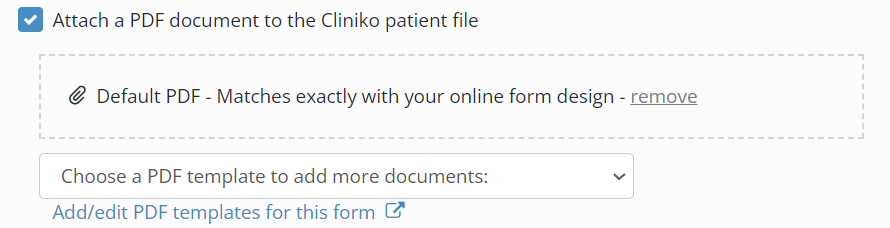
| Attach a PDF document to the Cliniko patient file | Attaches a PDF document that looks exactly like your online form (including the responses populated within the fields) to the patient file in Cliniko.
If you prefer to design your own PDF template or use a pre-made fillable PDF, click Add/edit PDF templates for this form (blue link) and follow the instructions in the PDF templates guide.
|
Set up basic field mapping
- In the Field Mapping section, select the form fields that correspond with each of the Cliniko fields. For example, link your ‘First Name’ field to ‘first name’, ‘Last Name’ to ‘last name’, and so on. Note: First Name, Last Name, and at least one of DOB, Email, Phone or Mobile are the minimum required mappings. For greater accuracy of data matching, you can add more field mappings.
- To add more field mappings, click Add Another Field, then select the form field from the list and map to the corresponding Cliniko field.
- To start syncing all submissions to Cliniko, scroll to the top and click Save.

Advanced customisation
Required values for Cliniko validation
In addition to mapping form fields to Cliniko fields, some Cliniko fields require specific values or formats to match their internal system. Use the table below to ensure your form field responses are perfectly aligned for a successful sync.
| Cliniko field name | Snapforms field choices must match one or more of the following values: |
| Referral Source Type |
Tip: To allow respondents to provide specifics about a referral source that is not listed (i.e. Other), you will need to add a text field to your form and map this field to the ‘Referral Source Notes’ field in Cliniko. |
| Reminder Types |
|
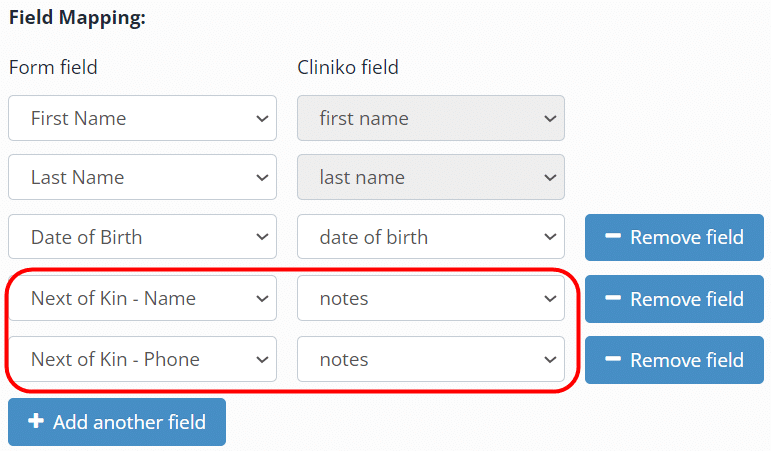
Syncing two form field responses to one Cliniko patient field
To sync two form field responses into one Cliniko field, map the desired form fields to the same Cliniko destination, as shown in the example below:
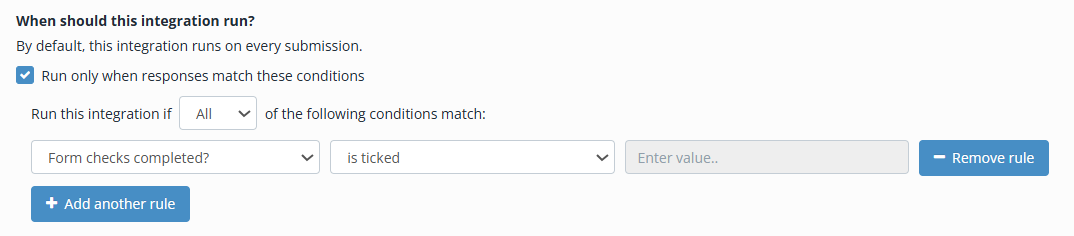
Using conditional logic to run integration
Instead of syncing every submission, you can apply conditional logic that triggers the integration only when specific criteria are met. This allows you to filter syncs based on responses or completion of workflow steps.
To control when the integration runs:
- Tick the Run only when responses match these conditions.
- Choose to run the integration if All or Any conditions match.
- Select a form field, or a workflow step (if configured).
- Select an operator, e.g. is, is blank, greater than, etc. Note: This list will vary depending on the selected field type.
- Enter a specific answer required to trigger the integration.

Troubleshooting
If your data isn’t appearing in Cliniko as expected, check the Response Activity Logs for errors and retrigger the sync.