How to Add a “Confirm Email” Field to Your Form
Typos in email addresses can lead to lost leads, failed registrations, and broken communication.
One of the most effective ways to prevent this is by adding a “Confirm Email” field to your form. By introducing this brief moment of friction, you encourage respondents to slow down and verify their input, ensuring their information is captured accurately.
In this guide, we’ll show you how to use Shortcodes and Regex to create a validation rule that compares two fields in your form and alerts the respondent when they don’t match.
Set up the email fields
First, you need to add two separate fields to your form.
- Primary Email Field: Add an “Email” field type and enter “Email” as the name. Take note of the Internal Name (e.g., Email) as this will be the field shortcode we will use to validate the “Confirm Email” field.

- Confirm Email Field: Add a “Short Answer” field directly below the first. Label this “Confirm Email” or “Re-enter Email.”

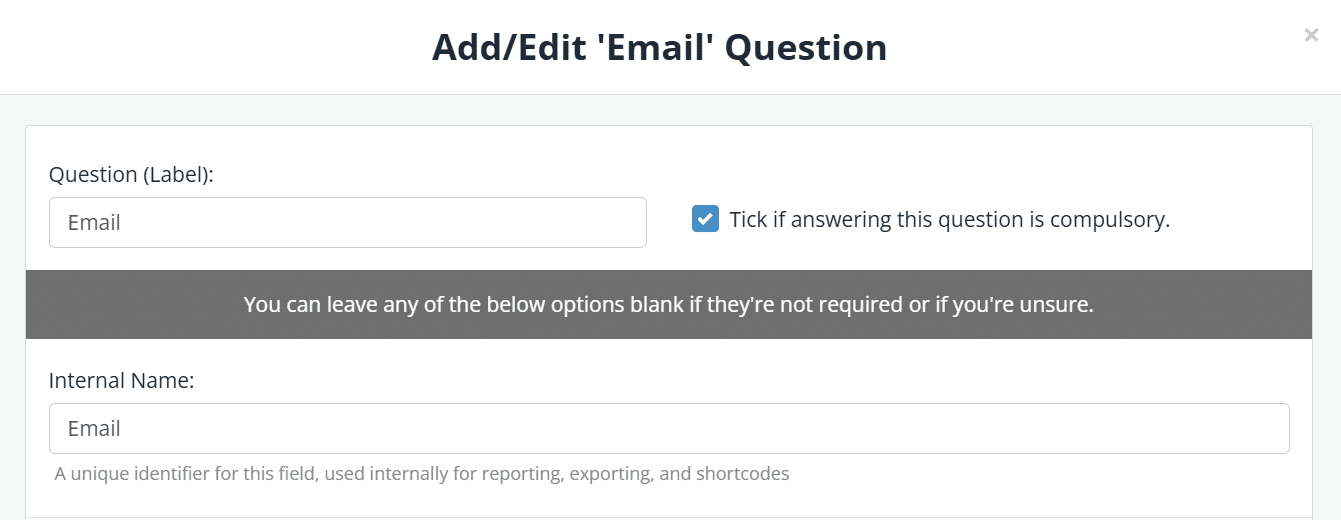

What’s a shortcode? Every field has a unique identifier that can be used as a placeholder for the respondent’s answer. If the field’s internal name is “Email,” the shortcode is {{email}}. Note: shortcodes must always be in lowercase.
Apply the validation rule
To force the second field to check against the first, apply a custom Regex validation rule to the “Confirm Email” field:
- Navigate to Advanced Options > Answer Rules & Validation.
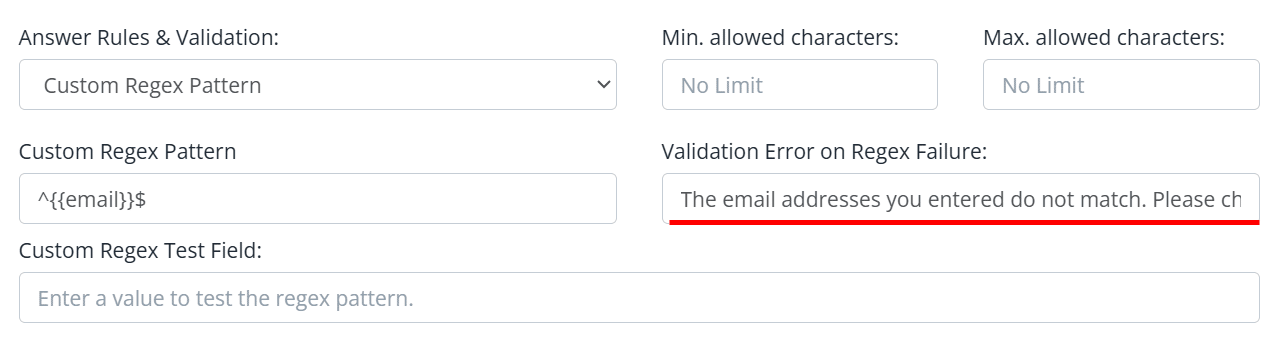
- Choose Custom Regex Pattern as the validation type.
- Enter the following pattern:
^{{email}}$
(Replace {{email}} with the actual shortcode of your first field).

How the Regex works:
- ^ : Tells the form to start checking from the beginning of the text.
- {{email}} : Grabs the exact value the respondent typed into the first field.
- $ : Tells the form to stop checking at the end of the text.
In plain English: Only allow this field to be submitted if it is an exact match to the first email field.
Customise the error message
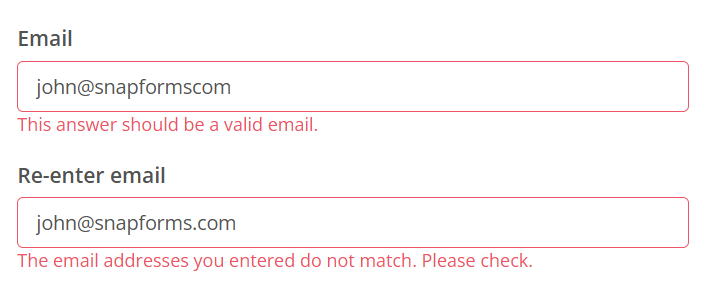
If the fields don’t match, the respondent needs clear feedback. In the Validation Error on Regex Failure box, enter a helpful prompt such as “The email addresses you entered do not match. Please check.”
Best practices: To confirm email or not?
While adding a “Confirm Email” field is a common way to reduce errors, extra steps like this can frustrate respondents and lead to form abandonment. Use the following criteria to decide when it’s necessary:
When to use a “Confirm Email” field
- High-stakes transactions: Use for high-value purchases or account registrations where a typo blocks access to the product. For a simple “Contact Us” form, it is likely to add unnecessary friction.
- No edit capability: If your systems or processes don’t allow form users to easily change their email later, catching errors upfront is vital.
- Sensitive data: For medical or legal forms where a typo could result in sensitive information being sent to the wrong person.
Implementation tips for better User Experience (UX)
If you decide to use a “Confirm Email” field, follow these rules to keep your form conversion rates high:
- Use clear error messages: Don’t just say “Invalid.” Use a specific message like: “The emails you entered do not match. Please check both fields.”
- Keep it below the original: Always place the confirmation field immediately following the primary email field to maintain a logical flow.
- Mobile optimisation: Typing an email twice on a mobile device is tedious. Consider if the extra step is worth the potential drop-off in conversion before making it mandatory.