Nookal Integration Setup
Snapforms allows clinics and allied health practitioners to create secure digital forms for patient registration, intake, referrals, signed consent, assessments and more.
With the Nookal practice management integration, Snapforms can automatically add and update patient files in Nookal using the information provided in your patients’ form responses.
How does the Nookal integration work?
- When a patient submits a completed form, it’s automatically synced to their file in your Nookal account.
- Got a new patient? No problem! Once they submit an intake, registration, or referral form, a new patient file is automatically created in your Nookal account with all their details filled in.
- Existing patient files can also be automatically updated via forms that are connected to Nookal.
- For both new and existing patient files, a PDF copy of the form is saved in their Nookal patient file.
How to set up the Nookal integration
Before you start
This guide assumes you’ve already created your online form using the drag-and-drop form builder. Please ensure your form has all the fields required for adding and updating patient files in Nookal.
If you’re new to Snapforms, we recommend you check out our 10-minute getting started video or have a look through our help guides to learn how to set up your form.
Obtain a Nookal API key
To connect Snapforms to Nookal, you will need to generate a new API key in your Nookal account. Once you’ve obtained the API key, log into Snapforms and configure the following integration settings on your form.
Configure the form integration settings
- Open your form in edit mode and select the Form Settings tab.
- Select Integrations > Nookal.
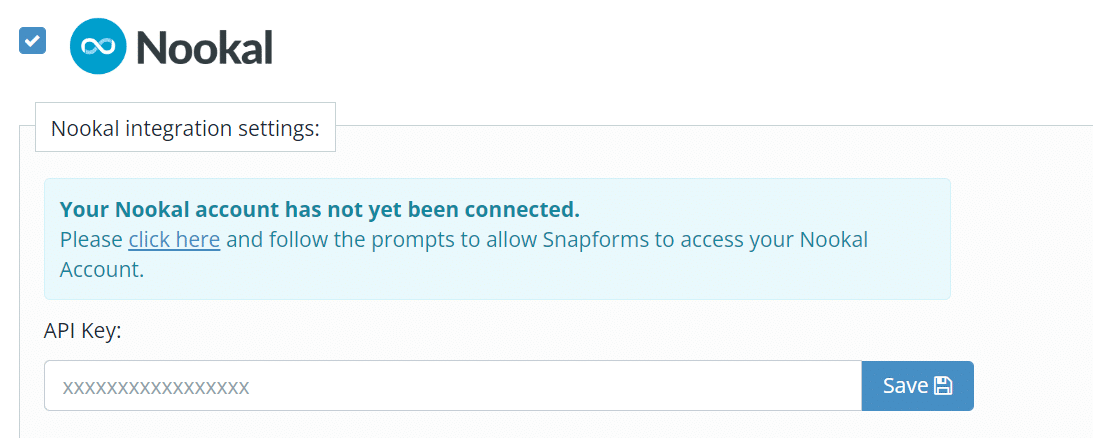
- If this is the first connection, click the click here link to display the API Key field.
- Copy/paste in the API key and click Save. This API key is now saved and can be used across different forms.
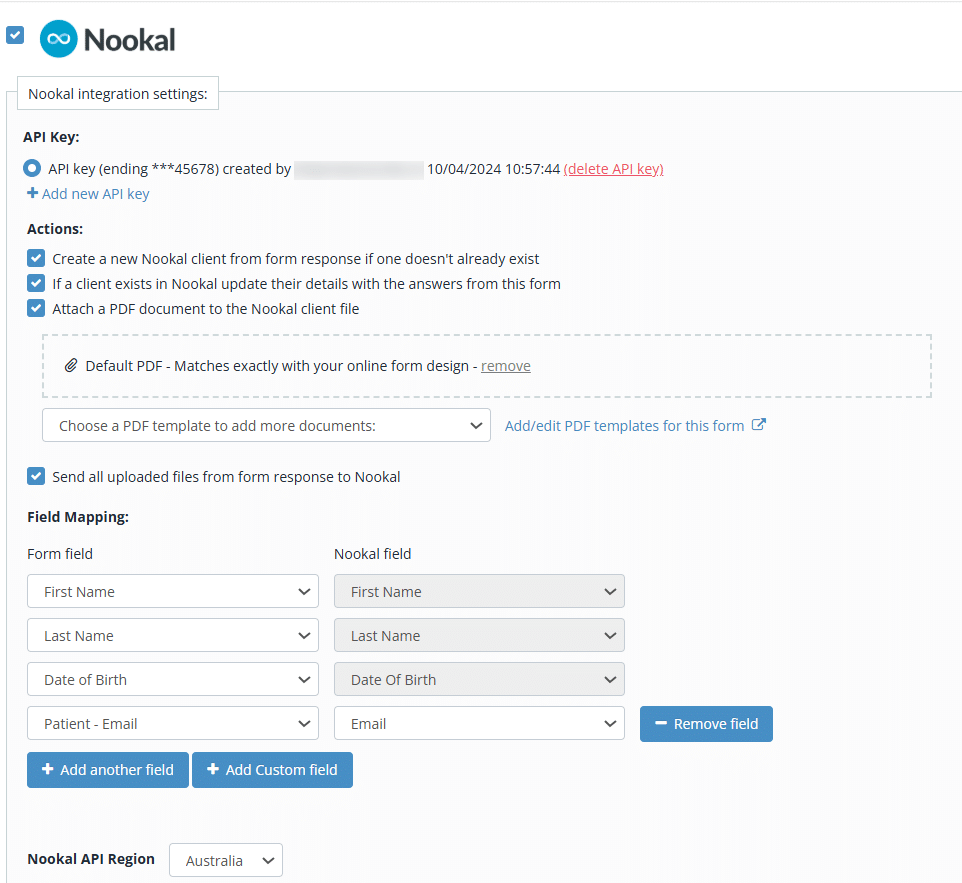
- Enable the integration actions you require.
- In the Field Mapping section, select the form fields that correspond with each of the Nookal fields. Note: First Name, Last Name, and Date of Birth are the minimum required mappings. For greater accuracy of data matching, you can add more field mappings.
- To add more field mappings, click Add Another Field, then select the form field from the list and map to the corresponding Nookal field.
- Set your Nookal API Region.
- Once complete, scroll to the top and click Save.
Nookal integration actions explained
| Action | Enable this if you want to… |
| Create a new Nookal patient from form response if one doesn’t already exist | Create new patient files in Nookal using the mapped fields from the form responses. |
| If a patient exists in Nookal update their details with the answers from this form | Update existing patient files in Nookal using the mapped fields from the form responses. |
| Attach a PDF document to the Nookal patient file | Attach a PDF document that looks exactly like your online form (including the responses populated within the fields) to the patient file in Nookal.
If you prefer to design your own PDF template or use a pre-made fillable PDF, click Add/edit PDF templates for this form (blue link) and follow the instructions in the PDF templates guide.
|
| Send all uploaded files from form response to Nookal |
Send all files uploaded (via the File Upload field) in form responses into the documents section of the associated patient profile in Nookal. |
Populating two form fields into one Nookal client field
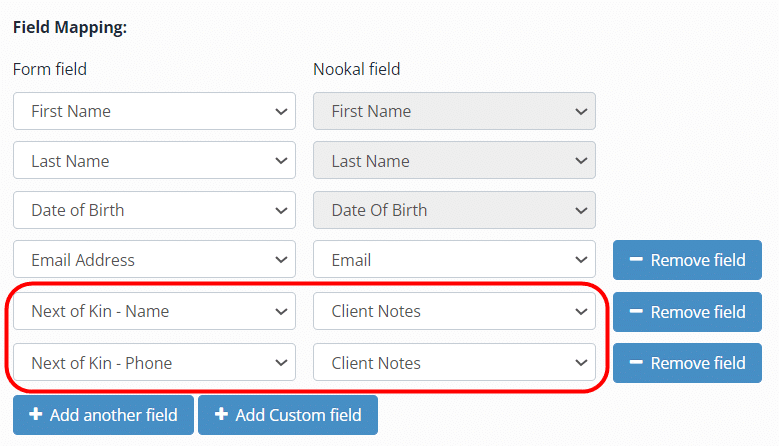
There may be a situation where you need to populate two form fields into a single field in Nookal, for example in the ‘Client Notes’ field.
To do this, you can simply map two different form fields, in the order you want them to appear, to the same Nookal field. Example below:
Mapping Nookal custom fields
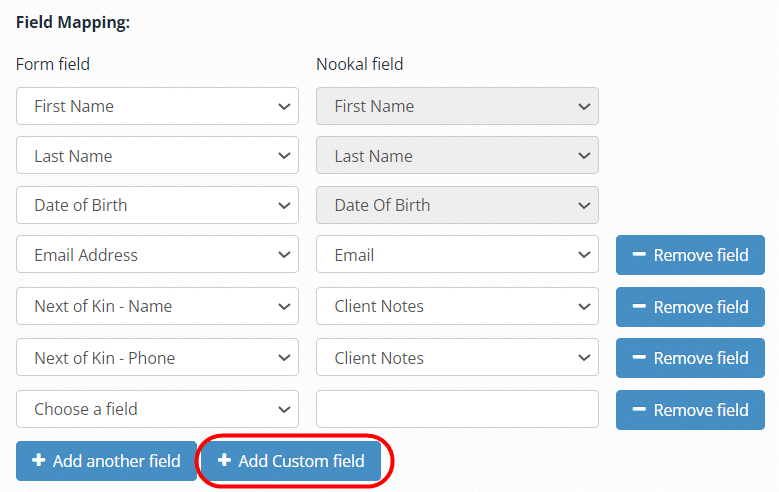
If you’ve set up custom fields in Nookal, you can include them in your form’s field mappings by selecting the ‘Add Custom Field’ button. This will add a free text field that allows you to enter the Nookal custom field name.
Troubleshooting
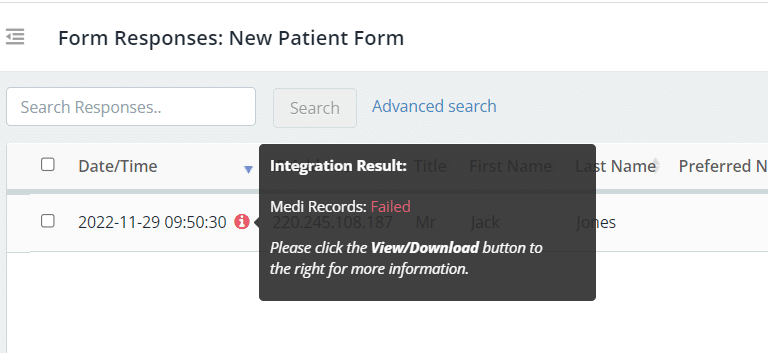
If the integration fails to create or update a file in your patient management system, you can check the integration results and logs in the form’s responses.
- In the Forms List, on the form click Actions > View Responses.
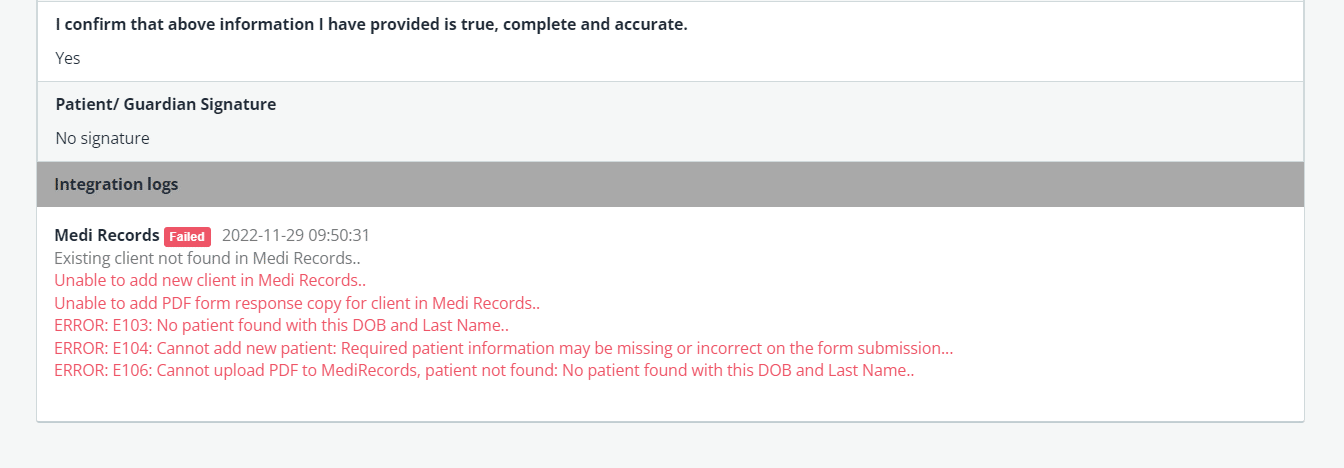
- For more details, click View/Download.
- Scroll to the bottom of the response details to the integration logs.
If you’re unable to resolve any issues, please feel free to get in touch with us for assistance.

