SAML SSO Guide for Entra ID Lookup
The Entra ID Lookup field allows form users to look up other users in their SSO organisation based on a given group ID.
Note: This field type can only be added to forms that have SSO protection set up and enabled.
This guide outlines how to configure an application client that will be used to authorise access to the Microsoft Graph API on behalf of a user.
In order to make calls to the Microsoft Graph API, users authenticate via SAML and then transparently proceed through an OAuth flow to authorise access to resources on the Microsoft Graph API.
Register an application with Microsoft Entra ID
To create a new app registration for Snapforms Microsoft Graph API access:
- Log into the Azure Portal using your administrative credentials.
- In the left menu, select Microsoft Entra ID, or use the search bar to find it.
- Click App registrations to see a list of your applications.
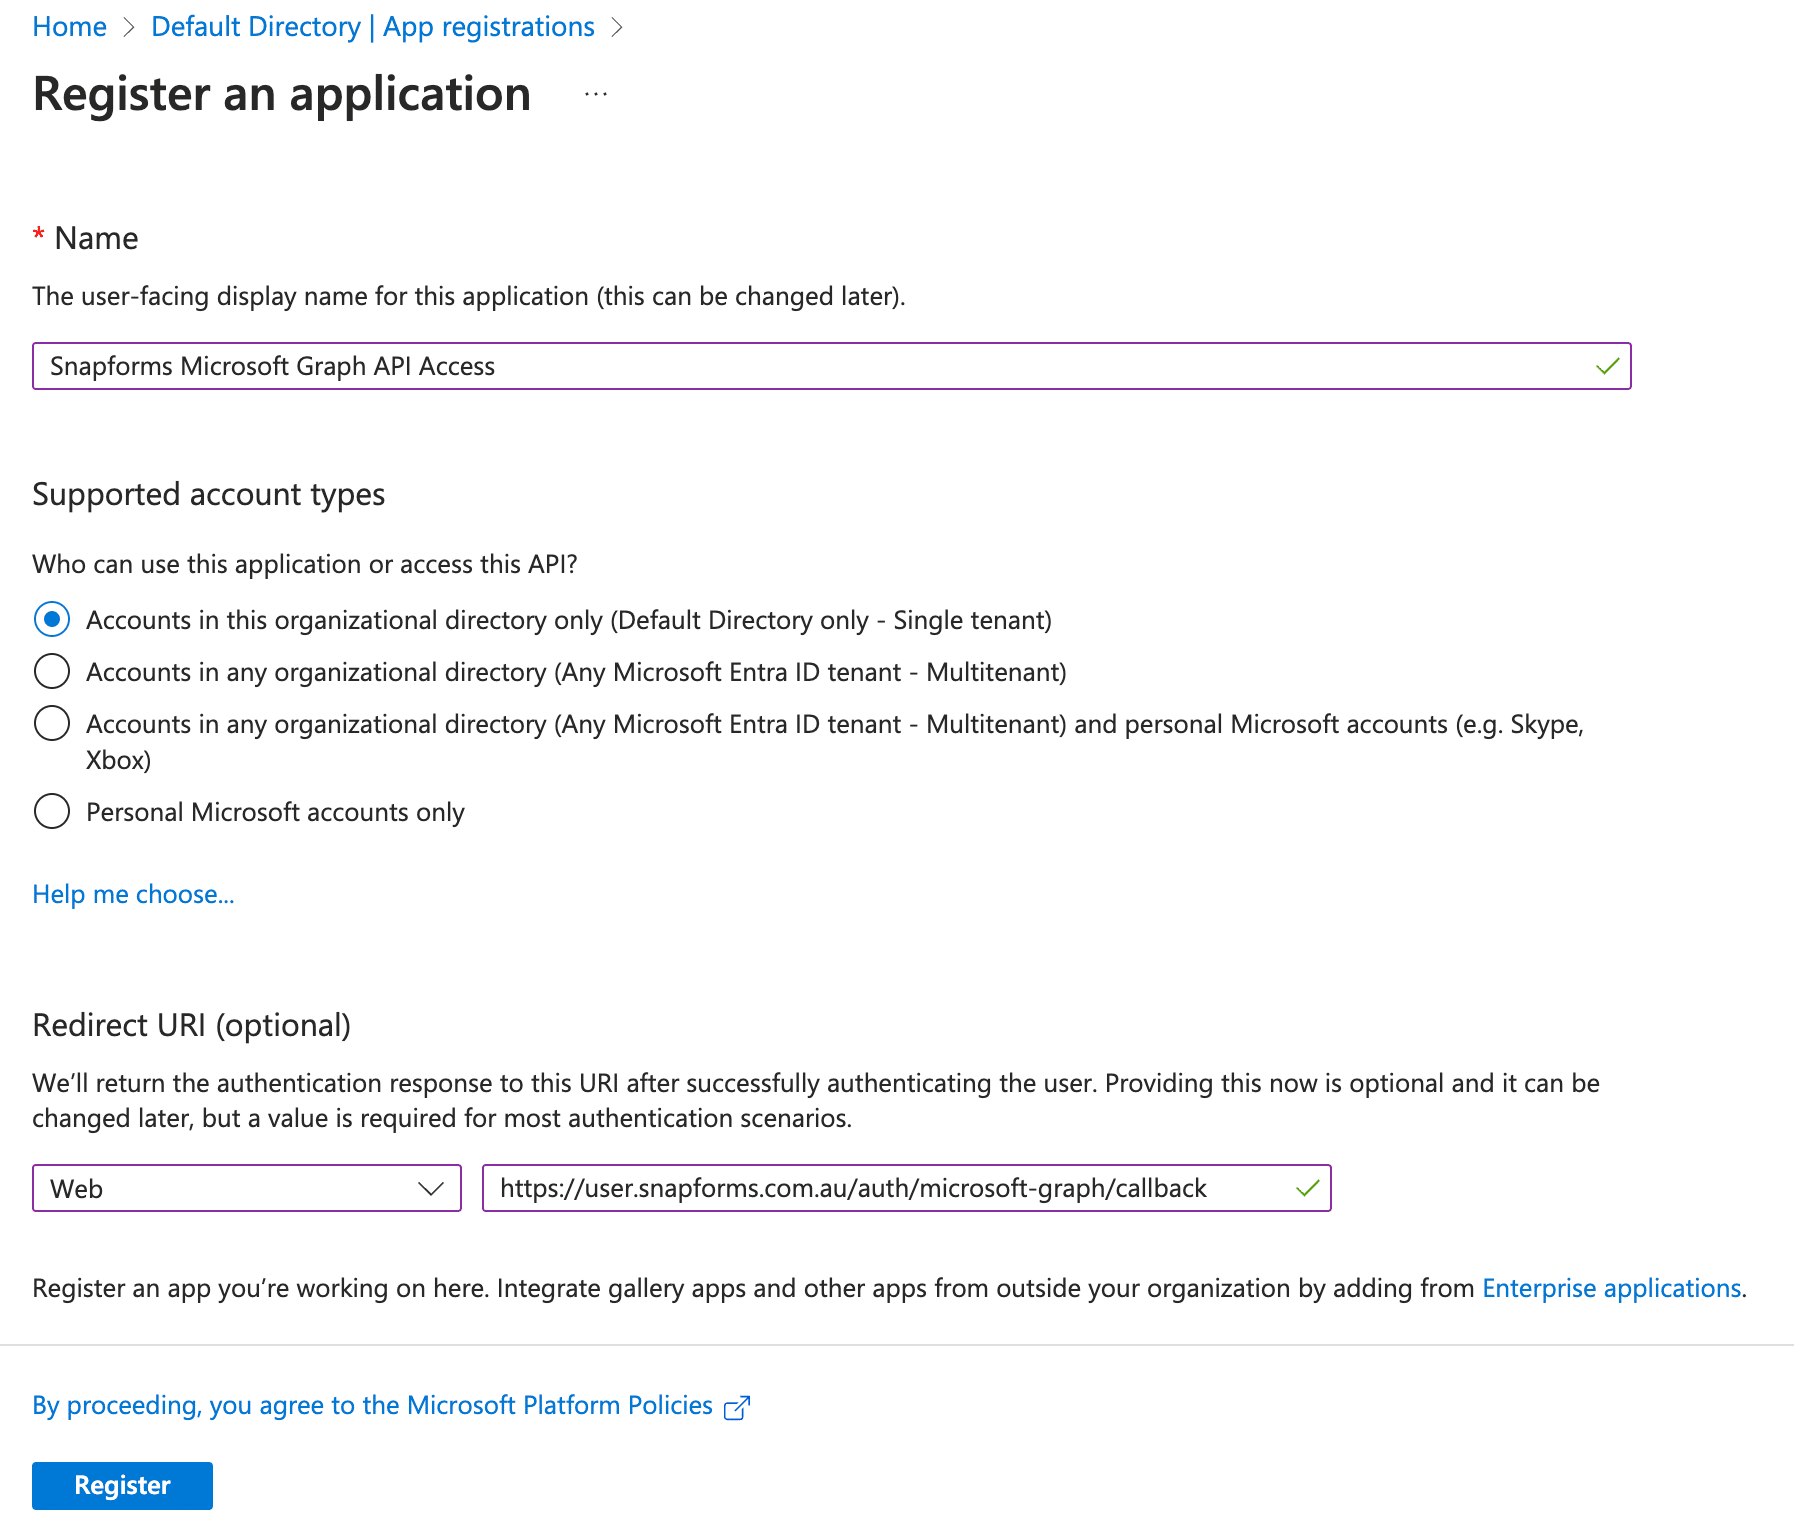
- Click + New registration.
- Enter the required details such as the application name, supported account types, and the following redirect URI, replacing {{username}} with your organisation username:
https://{{username}}.snapforms.com.au/auth/microsoft-graph/callback
- Click Register.
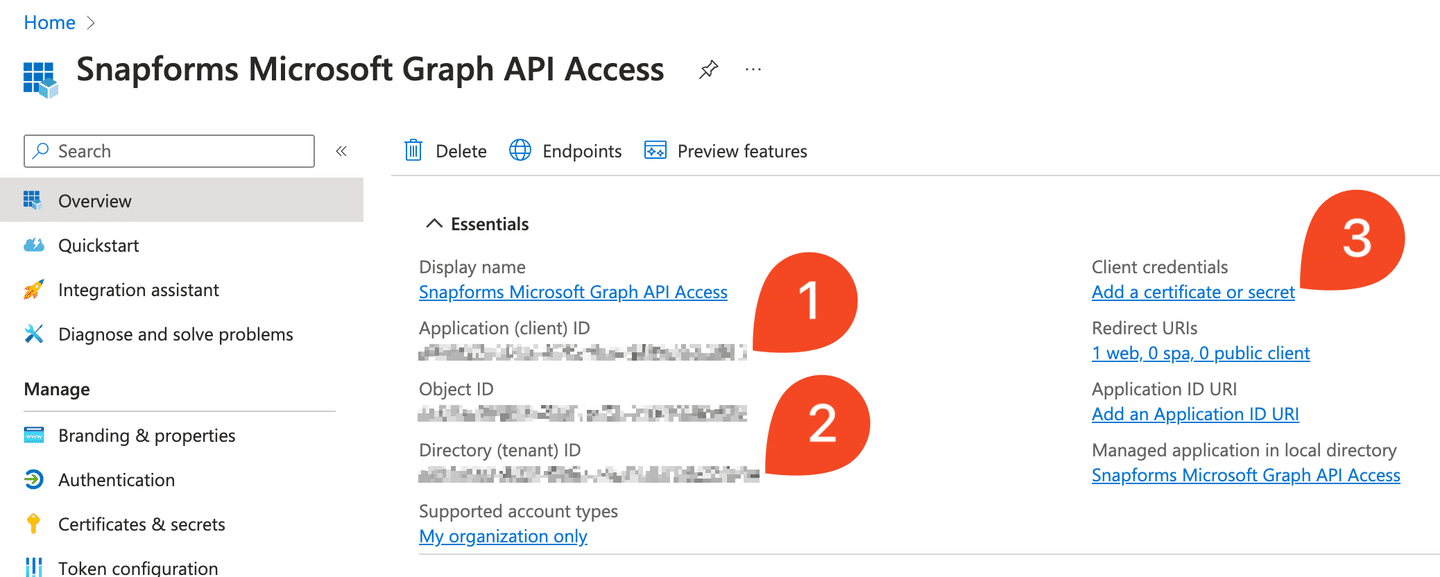
- On the Overview page of the new application, record the value under ‘Application (client) ID’ and ‘Directory (tenant) ID’ marked (1) and (2) in the image below, for use in Snapforms.

- Click Add a certificate or secret marked (3) in the image above.
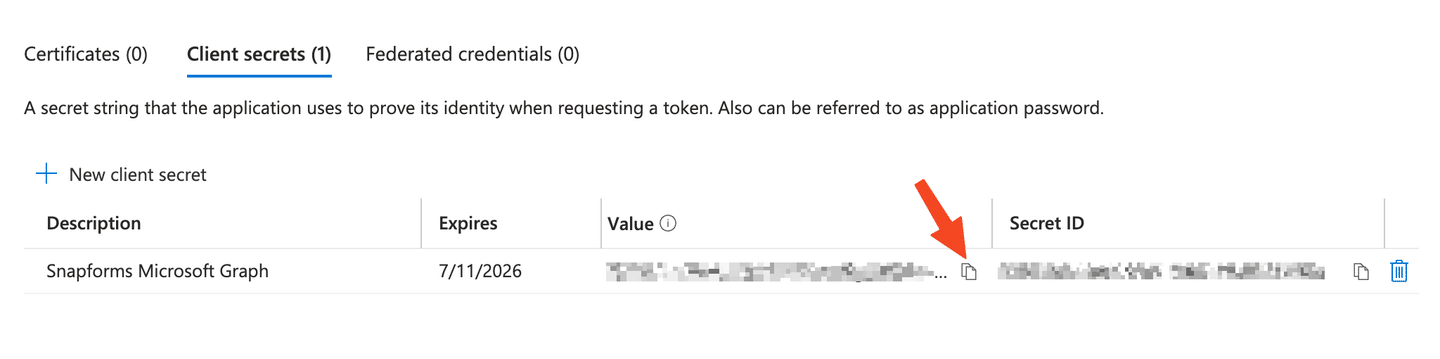
- Click + New client secret to create your secret.
- Click the copy icon and record the secret value for use in Snapforms. Once you leave this page, the secret value will never be displayed again.

- Contact our Support Team and provide the credentials you recorded in the previous steps. We will enable the integration on your account.
Limiting access: You may wish to limit access to this application to specific users. You’ll need to configure this from the Enterprise Application tab, which you can also reach via the ‘Managed application in local directory’ link in the application overview. While we recommend configuring this to match your SAML configuration, Snapforms will never attempt to direct a user through this OAuth flow until the SAML flow has succeeded.
Now that your application is set up, you will need to ensure your application has the required permissions to use the Microsoft Graph Lookup field.
Add API permissions
Before using the Microsoft Graph Lookup field in a form, your Microsoft Entra ID application will need the following Microsoft Graph API permissions:
- User.ReadBasic.All
- User.Read.All (required for certain fields such as jobTitle, mobilePhone, and officeLocation)
- GroupMember.Read.All
This will provide sufficient permission to allow the retrieval of members in a given group, and information about those members.
To add Microsoft Graph API permissions:
- Log into the Azure Portal using your administrative credentials.
- In the left menu, select Microsoft Entra ID, or use the search bar to find it.
- Click App registrations to see a list of your applications.
- Select the application, e.g. Snapforms Microsoft Graph API Access.
- In the left menu, click API permissions.
- Click + Add a permission to open the Request API permissions window.
- Select the Microsoft Graph API.
- Select Delegated Permissions.
- Use the search bar to find ‘User.ReadBasic.All’, then check the box to select it.
- Use the search bar to find ‘GroupMember.Read.All’, then check the box to select it.
- Click Add permissions.
- Click Grant admin consent for [Your Organisation] and confirm the action.