Notification emails
Notification emails make it easy to stay on top of form submissions without constantly checking for new entries. As soon as someone fills out a form, an automated email can land in the right inbox, keeping things moving smoothly.
You can set up multiple notification emails and use conditional logic to determine when each one should be sent based on specific conditions or rules.
Whether it’s a customer inquiry, job application, or support request, automated emails help you respond faster and keep everything organised.
Set up notification emails
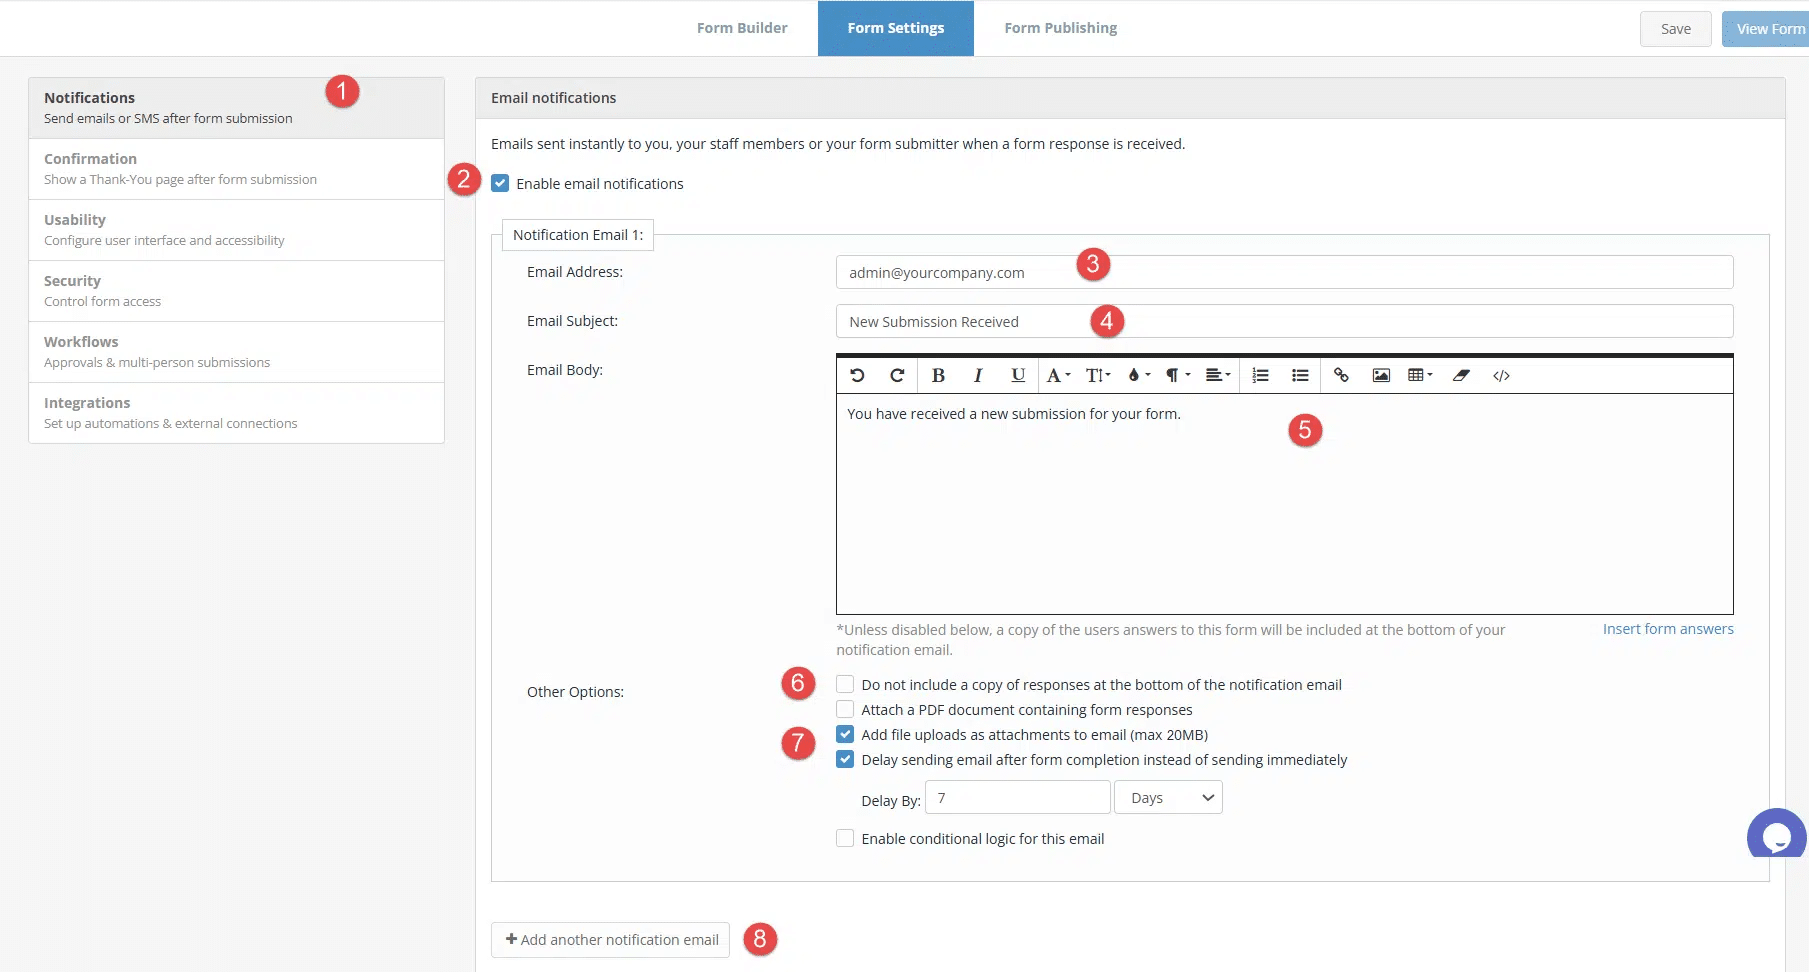
- Go to Form Settings > Notifications .
- Under Email Notifications, tick Enable Email Notifications.
- Enter the email address that you want the form responses sent to, e.g. your email address or an alternative monitored inbox.
Note: Multiple recipient email addresses may be entered by using a comma to separate each email address, e.g. john@yourcompany.com,sarah@yourcompany.com,admin@yourcompany.com - Enter the email subject that you want to appear as the ‘Subject:’ on the email, e.g. New Submission Received
- In the email body, you can design your message using the rich-text editor toolbar. To personalise the content, click insert form answers and copy/paste the relevant short-codes into your message, e.g. {{first name}}
- (Optional) Enable any response attachment options you require.
- (Optional) Enable any email delivery options you require.
- (Optional) If your workflow requires multiple email notifications, click Add another notification email and complete the fields.
- Scroll to the top and click Save.

Response attachment options explained
| Option | Description |
| Do not include a copy of responses at the bottom of the confirmation email | By default, a list of form fields and their response details are included at the bottom of the notification email. You can turn this off by checking this box. |
| Attach a PDF document containing form responses | Attaches a PDF copy of the form responses to the email.
This can be useful in saving documents that you may need to refer to, store individually, or print later. If you want to customise the default PDF document, see our PDF templates guide. |
| Add file uploads as attachments to email (max 20MB) | By default, secure links to the uploaded files are automatically included in the body of the email.
Tick this option to include uploaded files as email attachments. Note: When the email attachment size limit (total 20MB) is exceeded, recipients will receive an attachment_errors.txt file that indicates which files could not be sent. The largest files are skipped first to maximise included content. Uploaded files can be viewed and managed either within their particular response via the View Responses tab or along with all other files in the File Manager tab. |
Email delivery options explained
| Option | Description |
| Delay sending email after form completion instead of sending immediately | Allows you to delay sending email notifications for a specified period.
This is useful for sending workflow reminder emails to remind workflow participants to complete a task. |
| Enable conditional logic for this email | Use conditional logic to send this email only when form responses meet specific conditions or rules.
To learn more, see Show or hide fields using conditional logic. |
Troubleshooting email delivery
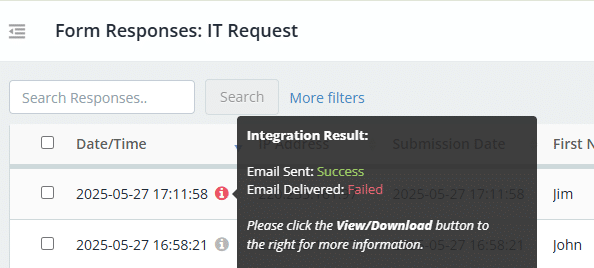
If you’re not receiving email notifications, you can check the delivery status via the Form Responses list:
- In the main menu, click Forms.
- On the form, click Actions > View Responses.
- Mouse over the information icon to view integration results.

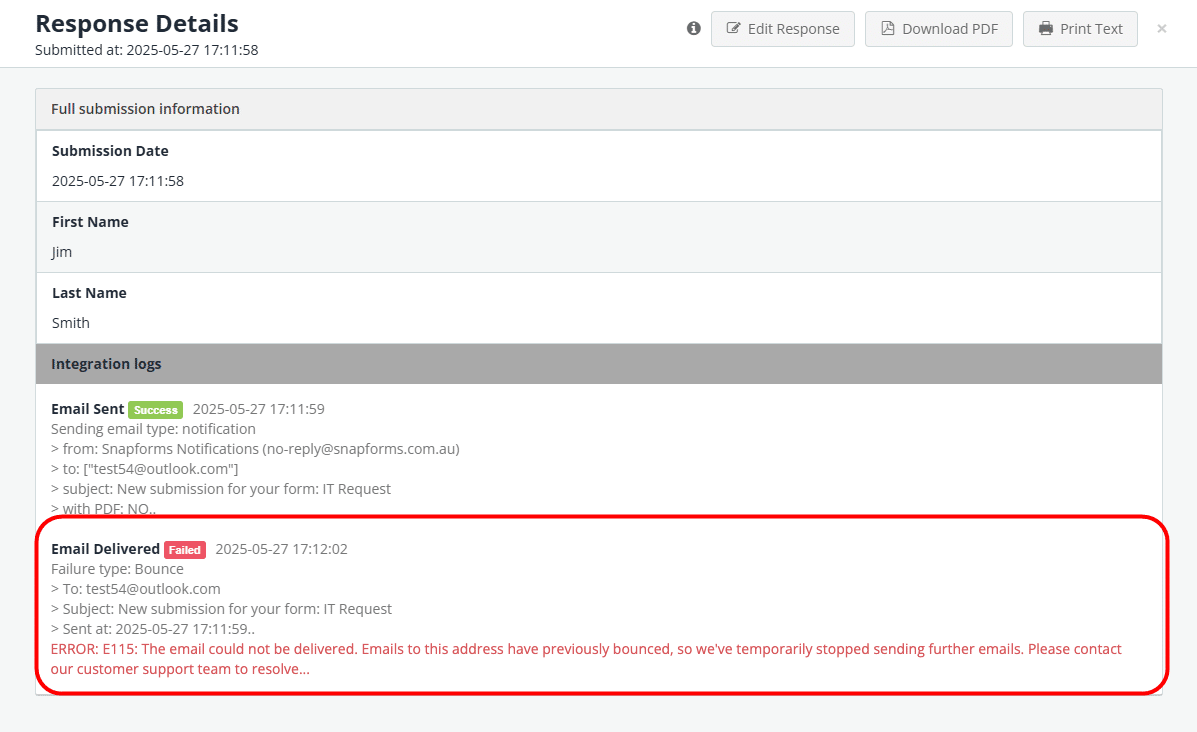
To see more details about the email delivery status:
- Next to the form response, click View/Download.
- Scroll to the bottom of the response details to the integration logs.